
Tile Installation: Pro Tips for a Flawless Floor
Discover essential tile installation tips, from planning and materials to avoiding common mistakes, ensuring a flawless floor that lasts.

By Danica Leslie
Learn more about Tile Installation and Replacement for guides, costs, and what to expect.
Compare Tile Installation and Replacement Pros Near You

Enter your ZIP code to compare top-rated local professionals and request free quotes.
Standing in the tile aisle, you are likely torn between the allure of a stunning mosaic and the fear of a crooked, hollow-sounding floor. Tile installation is one of the most rewarding home improvement projects you can tackle, yet it is also one where small mistakes become permanent eyesores. Whether you are updating a bathroom floor or creating a kitchen backsplash, the difference between a professional-looking result and a costly failure often comes down to preparation, technique, and knowing when to call in an expert.
This guide walks you through the entire process, from planning and material selection to grouting and sealing. You will learn the critical steps that ensure durability and beauty, and you will discover how to avoid the pitfalls that plague DIYers. By the end, you will have the knowledge to decide whether this project is right for your skill level or whether you should connect with a qualified local professional for a free, no-obligation quote.
Why Proper Tile Installation Matters
A tile floor is a significant investment, and its longevity depends almost entirely on the quality of the installation. Poorly set tiles can crack under pressure, shift over time, or develop hollow spots that make every step feel unstable. Water can seep through gaps in the grout, leading to mold and structural damage beneath the surface. These issues are not just cosmetic; they can turn a beautiful upgrade into a major repair headache.
Beyond durability, a flawless installation elevates the entire aesthetic of a room. Straight lines, even grout joints, and a level surface create a polished, high-end look that instantly adds value to your home. In contrast, a wavy tile layout or inconsistent spacing can make even expensive tile look cheap. When you understand what goes into a proper job, you can better appreciate the craftsmanship of a skilled installer and communicate effectively with any contractor you hire.
Many homeowners also underestimate the physical demands of the work. Lifting heavy boxes of tile, kneeling for hours, and cutting precise notches around obstacles require stamina and patience. If you have back or knee issues, or if the project spans a large area, professional help might be the smarter choice. The goal is to achieve a result you can be proud of, whether you do it yourself or hire a pro.
Planning Your Tile Installation Project
Success starts long before you mix the first batch of thinset. Careful planning saves time, money, and frustration. Begin by measuring the area accurately. For floors, multiply the length by the width to get the square footage, then add 10% to 15% for waste, cuts, and breakage. For walls and backsplashes, do the same, but consider that more complex patterns like diagonal or herringbone will require extra material.
Choosing the Right Tile for Your Space
The type of tile you select affects both the look and the installation process. Ceramic and porcelain are the most common choices for floors and walls due to their durability and water resistance. Porcelain is denser and less porous, making it ideal for bathrooms and entryways. Natural stone, such as marble or travertine, adds elegance but requires more maintenance and careful handling. Glass tile is stunning for backsplashes, but it can be tricky to cut and needs special thinset.
Consider the size and shape of the tile in relation to your room. Large-format tiles (12x24 inches or bigger) create a seamless, modern look and require fewer grout lines, but they are more difficult to install because they need a perfectly flat substrate to avoid lippage. Smaller tiles are easier for beginners to manage but involve more cutting and grout work. Always order a sample and lay it out in your space to visualize the scale before committing.
Substrate Preparation: The Key to a Lasting Installation
The surface beneath your new tile is just as important as the tile itself. Tile needs a stable, clean, and level base to adhere properly. For floors, this often means installing a cement backer board over the plywood subfloor. This board prevents moisture damage and provides a rough surface for thinset to bond to. For walls, ensure the drywall is smooth and free of paint or texture that could compromise adhesion.
Check for any dips or high spots using a long level. If the floor is uneven, you may need to apply a self-leveling compound before laying the backer board. Fixing these issues now prevents future cracks and lippage. Take the time to vacuum the substrate thoroughly and prime it if recommended by the adhesive manufacturer. Skipping this step is a common cause of tile failure that could have been easily avoided.
Step-by-Step Tile Installation Process
Once your materials are ready and the substrate is prepped, you can begin the installation. Follow these steps in order to achieve a professional result. It is always wise to work in small sections to prevent the thinset from drying out before you set the tile.
- Dry lay the tiles: Arrange a row of tiles on the floor without adhesive to check the layout and the size of your cut pieces. This helps you adjust the pattern and ensure you do not end up with narrow slivers at the edges.
- Mix the thinset: Use a drill with a paddle mixer to combine the thinset mortar according to the manufacturer's instructions. It should have a peanut butter consistency, holding its shape when you make a ridge with a trowel.
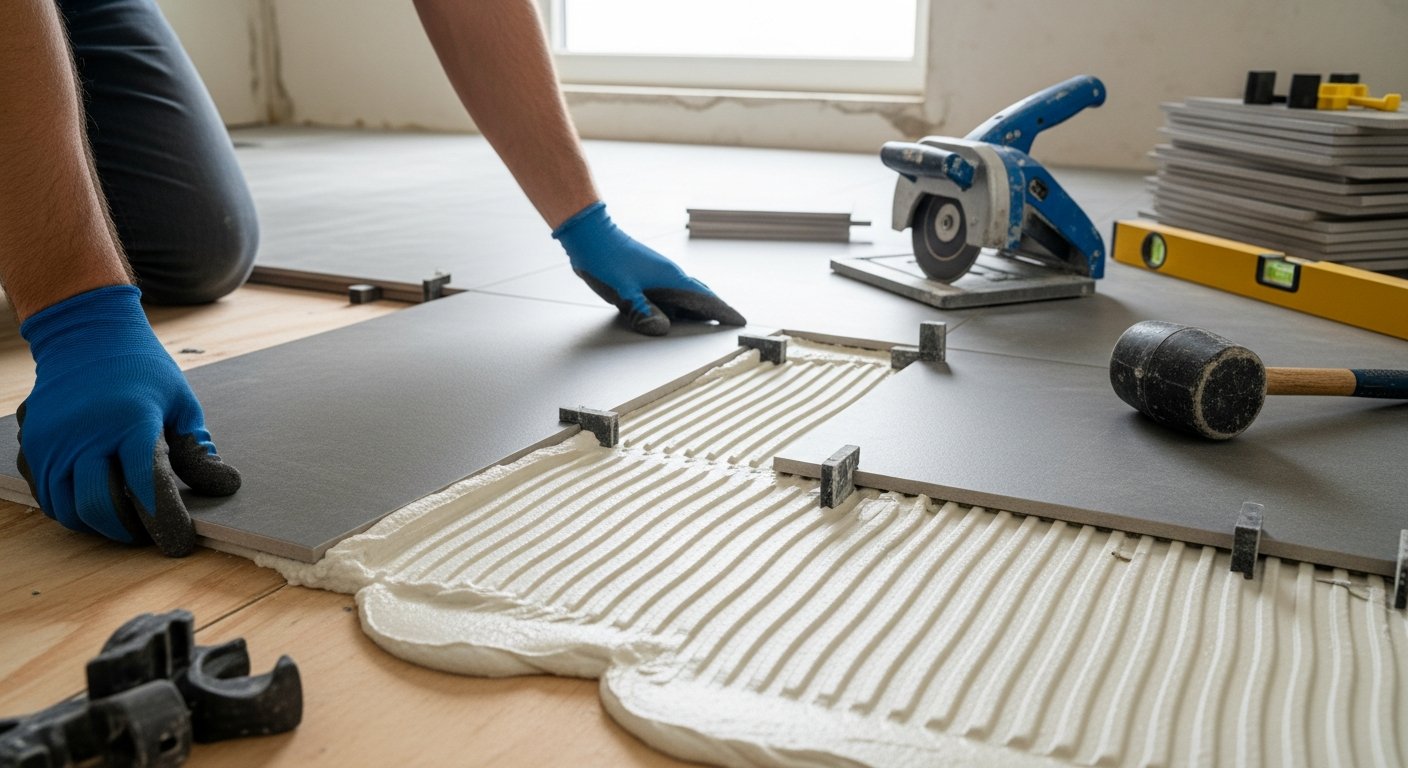
- Apply the thinset: Using a notched trowel, spread the thinset onto a small area of the substrate, holding the trowel at a consistent angle to create uniform ridges. For larger tiles, also apply a thin layer to the back of the tile (back buttering) to ensure full coverage.
- Set the tiles: Press each tile into place with a slight twisting motion to collapse the ridges and achieve maximum contact. Use tile spacers to maintain even gaps between tiles. Check frequently with a level to ensure the surface is flat.
- Cut tiles for edges and fixtures: Measure and mark tiles that need to fit around obstacles, then cut them using a wet saw or tile cutter. Make precise cuts for outlets, pipes, and door frames.
- Allow the thinset to cure: Wait at least 24 hours, or as directed by the thinset manufacturer, before walking on the tiles or starting the grouting process. This drying time is critical for a strong bond.
After the thinset cures, you can move on to grouting. Mix the grout according to the package directions and apply it with a rubber float, pressing it firmly into the joints. Remove excess grout from the tile surface with a damp sponge, working in a circular motion. Be careful not to remove grout from the joints themselves. Once the grout has dried slightly, polish the tiles with a dry cloth to remove any haze.
The final step is sealing. While many grouts come with sealer mixed in, it is still recommended to apply a penetrating sealer to protect the grout from stains and moisture. Some natural stone tiles also require sealing to prevent etching and water damage. Follow the manufacturer's guidelines for the specific products you used.
Common Tile Installation Mistakes to Avoid
Even with careful planning, certain errors can compromise your work. Being aware of these pitfalls can save you from a frustrating redo. The most frequent mistakes include starting without a level substrate, using the wrong trowel size, and rushing the curing process.
- Skipping layout planning: Starting at a wall without considering the entire room can leave you with awkward cuts in visible areas. Always plan to center the pattern and balance the cut pieces.
- Inconsistent thinset coverage: If you do not back butter large tiles, you will get hollow spots and potential cracking. Always aim for 100% coverage on floor tiles.
- Grouting too early: Grouting before the thinset is fully cured can cause the tiles to shift and create lippage. Patience is crucial.
- Using the wrong grout: Use unsanded grout for joints smaller than 1/8 inch and sanded grout for larger joints. The wrong choice can lead to cracking or shrinkage.
- Ignoring expansion joints: Tile expands and contracts with temperature changes. Leave a gap at the edges and use caulk instead of grout where the tile meets other surfaces like bathtubs or cabinets.
Understanding these common mistakes helps you anticipate issues before they arise. For instance, if you are tiling a large open-plan living area, you will need to plan for transition strips and expansion gaps every 20 to 30 feet. A skilled installer knows these nuances and can prevent future problems that might void your tile warranty.
DIY vs. Hiring a Professional Tile Installer
You have weighed the costs and considered your skill level, but the decision between DIY and hiring a pro still feels heavy. For small projects like a backsplash or a small powder room floor, a confident DIYer can achieve great results with the right tools and patience. However, for large areas, complex patterns, or natural stone, the risk of costly mistakes increases significantly.
Professional tile installers bring experience, specialized tools, and an eye for detail that ensures a flawless finish. They know how to handle unexpected challenges like out-of-square walls or uneven subfloors. Moreover, their work is often backed by a warranty, giving you peace of mind. If you choose to hire a pro, obtaining multiple quotes is essential to ensure you get a fair price for the scope of work. You can use resources like our comprehensive guide on professional tile installation services to understand what to expect and how to vet contractors.
Hiring a professional also saves you time. A project that might take you several weekends can be completed in a few days by an expert. Plus, you avoid the physical strain and the need to rent or buy expensive tools like wet saws and tile cutters. When you factor in the cost of these tools and the potential for wasted materials, professional installation can be more cost-effective than you think, especially for larger projects.
Cost Considerations and Budgeting
The cost of tile installation varies widely based on material, labor, and project complexity. On average, homeowners pay between $10 and $25 per square foot for labor, with materials adding another $2 to $15 per square foot. Natural stone and large-format tiles often command higher labor rates due to the extra care required. Your budget should also include the cost of underlayment, thinset, grout, and sealers.
When requesting quotes from contractors, be clear about the scope of work. Ask whether the price includes removal of old flooring, disposal, and moving furniture. Also, ask about the estimated timeline and whether the contractor will handle any necessary permits. Transparent pricing helps you avoid surprise bills later. To get a more accurate picture for your specific project, check out our detailed cost estimation resources that break down expenses by region and material.
It is wise to set aside an extra 10% to 20% of your budget for contingencies. You might discover rotten subfloor or need to purchase additional materials if the layout changes. Having a buffer ensures that you can complete the project without financial stress, and it allows you to make better decisions if unexpected issues arise.
Maintaining Your Newly Installed Tile
Once your tile is installed and sealed, proper maintenance will keep it looking new for decades. Regular sweeping or vacuuming removes abrasive dirt that can scratch the surface. Use a damp mop with a mild, pH-neutral cleaner for routine cleaning. Avoid acidic or abrasive cleaners, which can dull the finish and damage grout.
Reapply sealant to grout lines every year or as recommended by the manufacturer. This simple step prevents moisture penetration and staining. In areas prone to water, like showers, ensure that the caulk around edges remains intact and replace it if it starts to peel. With minimal upkeep, your tile installation will continue to enhance your home's beauty and value.
If you notice any cracked tiles or damaged grout over time, address them quickly to prevent water from seeping beneath the surface. Small repairs are much easier and cheaper than a full replacement. Keeping a few spare tiles and some matching grout from your original installation can make these fixes seamless.
Final Thoughts on Your Tile Project
Tile installation is a transformative project that can dramatically improve the look and function of your home. Whether you decide to take on the challenge yourself or hire a professional, the key is thorough preparation and a commitment to quality. By understanding the process, avoiding common mistakes, and budgeting wisely, you set the stage for a beautiful, durable floor that you will enjoy for years.
Remember that a professional installer can save you time and ensure a flawless result, especially for complex projects. Before you commit, gather multiple quotes and ask the right questions. For more guidance on planning your renovation and connecting with trusted experts, explore our home improvement resources and learn how to get the best value for your project. And if you are still weighing the costs, our tile installation cost guide can help you set a realistic budget.
Your dream floor is within reach. With the right information and support, you can make confident decisions that lead to a stunning result. Start planning today, and soon you will be stepping onto a surface that combines beauty, durability, and pride.