
Whole House Air Sealing and Duct Leakage Assessment Guide
A whole house air sealing and duct leakage assessment pinpoints hidden leaks that raise bills. Call 8333658755 for vetted local pros and free quotes.

By Chelsea Kris
Learn more about Weatherization for guides, costs, and what to expect.
Compare Weatherization Pros Near You

Enter your ZIP code to compare top-rated local professionals and request free quotes.
A quiet house is not necessarily an efficient house. Even if your heating and cooling systems run without obvious problems, hidden gaps in your building envelope and leaks in your ductwork can force you to pay hundreds of dollars extra every year. A whole house air sealing and duct leakage assessment is the diagnostic process that finds those hidden problems and gives you a clear plan to fix them. For homeowners who want lower utility bills, better indoor comfort, and fewer surprise repair costs, this assessment is often the smartest first step before committing to larger HVAC or insulation projects.
What a Whole House Air Sealing and Duct Leakage Assessment Actually Measures
An air sealing and duct leakage assessment is not a visual inspection where someone walks around with a clipboard and guesses where air might be escaping. It is a series of controlled, measurable tests that quantify exactly how much air your home loses through its envelope and how much conditioned air your ducts waste before it ever reaches your living space. The two core tests are the blower door test and the duct leakage test, and together they create a complete picture of your home's air performance.
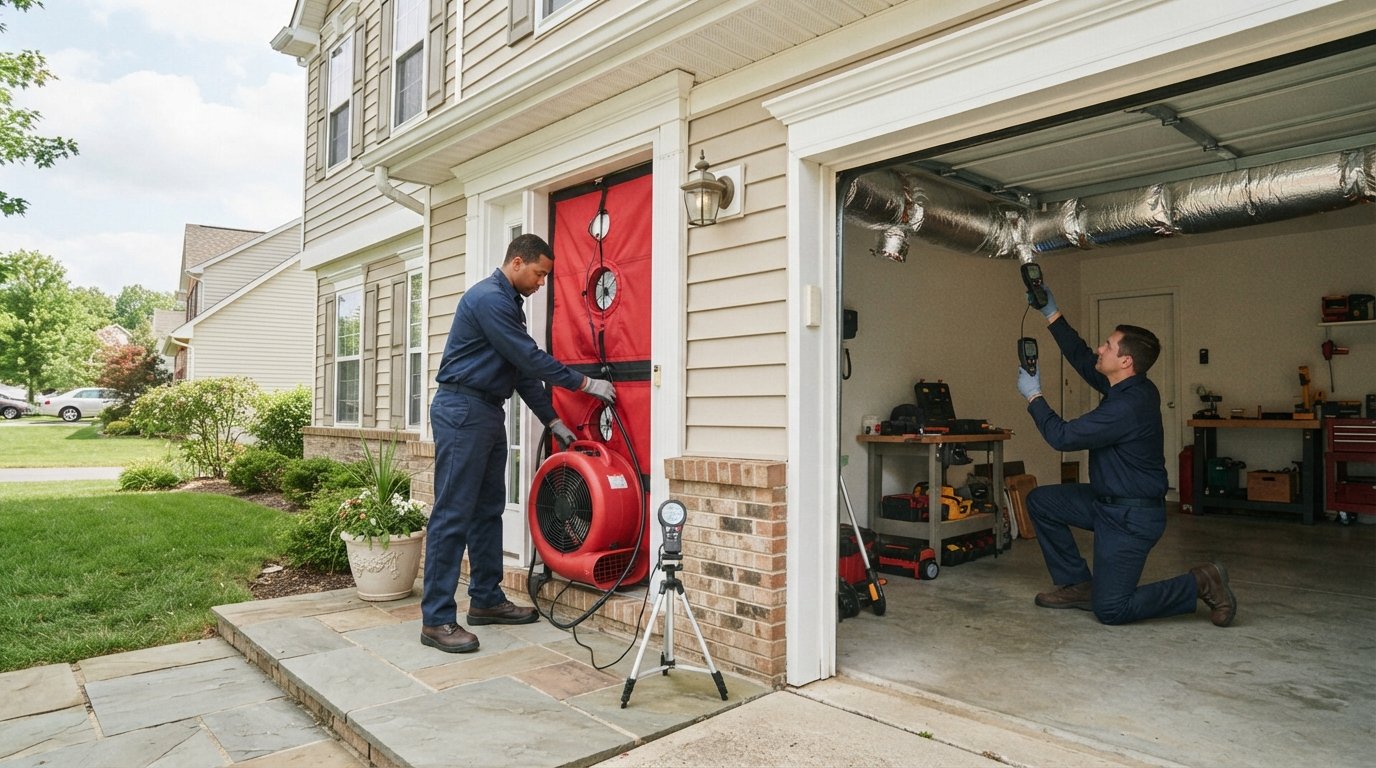
The blower door test uses a calibrated fan mounted in an exterior doorway. The fan depressurizes the house to a standard pressure difference, usually 50 pascals, and measures how much air flows through the fan to maintain that pressure. That airflow number, expressed in cubic feet per minute (CFM), tells the technician how leaky your building envelope is. A second calculation, called air changes per hour at 50 pascals (ACH50), adjusts that number for your home's volume so you can compare your house to recommended targets for your climate zone. The duct leakage test is similar in concept but focuses on the duct system. A duct blaster fan pressurizes the ducts while the house is either open or sealed, and the technician records how much air escapes from the ductwork itself.
These measurements matter because they remove guesswork. A homeowner might assume the drafty feeling in a bedroom comes from a bad window, when the real culprit is a disconnected duct joint in the attic or a missing top plate seal behind the drywall. Without measurement, you could spend thousands on the wrong fix and still have high bills. With measurement, you get a prioritized list of problems and a realistic estimate of how much improvement each repair will deliver.
Why Duct Leakage Deserves Separate Attention
Many homeowners focus entirely on windows, doors, and attic insulation when they think about energy efficiency. Ducts are easy to ignore because most of them run through unconditioned spaces like attics, crawlspaces, and garages where you rarely see them. But the U.S. Department of Energy has estimated that typical homes lose 20 to 30 percent of the air moving through their ducts because of leaks, holes, and poorly connected sections. In extreme cases, that number climbs even higher.
When ducts leak in an unconditioned attic, they pull in scorching summer air or freezing winter air and deliver it to your bedrooms and living areas. Your HVAC system then runs longer to compensate, which increases wear on the equipment and shortens its lifespan. Leaky return ducts are especially problematic because they can pull in dust, insulation fibers, and even exhaust gases from nearby spaces. In some homes, duct leakage creates pressure imbalances that pull radon or combustion byproducts into living areas, which is a health concern, not just an efficiency concern.
A duct leakage assessment separates two important figures: total duct leakage and leakage to outside. Total leakage measures all air escaping the ducts, including leaks that dump conditioned air into the attic or crawlspace. Leakage to outside measures only the air that is truly lost to the exterior or unconditioned space, which is the number that directly affects your energy bills. A good technician will report both, because sealing leaks inside the conditioned envelope has a different value than sealing leaks that dump air into the attic.
How the Assessment Process Works from Start to Finish
A professional assessment typically takes two to four hours depending on the size and complexity of the home. The process follows a logical sequence that builds from preparation to measurement to reporting. Understanding each step helps you ask better questions and evaluate whether the technician is doing thorough work.
- Pre-assessment walkthrough and preparation. The technician inspects the home, identifies all combustion appliances, and notes any safety concerns. Fireplaces, furnaces, and water heaters must be handled carefully because depressurizing a house can cause backdrafting if combustion appliances are not properly isolated or monitored.
- Blower door setup and baseline measurement. The technician installs the blower door, seals exterior openings as needed, and records the baseline envelope leakage. This establishes how much air the house leaks before any duct testing begins.
- Duct leakage testing with registers sealed or open. The technician connects the duct blaster to the air handler or a central return and measures leakage under controlled conditions. Registers may be temporarily sealed to isolate duct leakage from envelope leakage.
- Zone pressure diagnostics and infrared scanning. The technician may use pressure pans, smoke pencils, or thermal imaging to locate specific leak sites. Infrared cameras are especially useful in winter because they reveal temperature differences where air is moving through insulation.
- Written report with prioritized recommendations. You receive measured results, photos of problem areas, and a list of recommended repairs ranked by expected impact and cost.
After the measurements are complete, the technician should walk you through the findings in plain language. Ask for the actual numbers, not just a pass or fail judgment. A home that leaks 3,500 CFM at 50 pascals has a very different situation than one that leaks 1,200 CFM, and the repair strategy will differ accordingly. The same applies to duct leakage: a system leaking 15 percent to outside needs different attention than one leaking 40 percent.
What the Numbers Mean for Your Home and Your Budget
Interpreting assessment results requires context. Climate zone, home age, construction type, and HVAC system design all influence what counts as acceptable performance. A 1960s ranch house in a mixed climate might reasonably target 5 to 7 ACH50 after air sealing, while a newer home should aim for 3 ACH50 or lower. Duct leakage to outside should ideally be under 10 percent of total system airflow, though many older homes start at 25 percent or more.
These numbers translate directly into dollars. If your ducts leak 30 percent of their air to an unconditioned attic, roughly 30 cents of every dollar you spend on heating and cooling is conditioning the attic instead of your living room. Sealing those ducts and air sealing the envelope can reduce heating and cooling costs by 10 to 20 percent in many homes, according to ENERGY STAR estimates. On a $2,400 annual utility bill, that is $240 to $480 per year, which often pays back the assessment and repair cost within two to four years.
Beyond energy savings, air sealing and duct repair improve comfort. Rooms that were always too hot or too cold often become usable again once pressure imbalances are corrected. Indoor air quality improves when you stop pulling attic dust and insulation particles into the supply air. Moisture problems in attics and crawlspaces often diminish because air sealing reduces the stack effect that drives humid air into building cavities. If you are planning a larger renovation and want to understand how diagnostic costs fit into your overall budget, our guide on understanding foundation repair quotes shows how to evaluate contractor pricing for specialized diagnostic and repair work.
Air Sealing vs. Insulation: Getting the Order Right
Homeowners often ask whether they should air seal first or add insulation first. The answer is almost always air sealing first, because insulation works by trapping air, and if air moves freely through the insulation, its performance drops dramatically. Blowing cellulose or fiberglass over a leaky attic floor without sealing the gaps underneath is like putting a blanket over a sieve. The insulation looks good in the attic, but the air still moves through it.
Air sealing targets the specific pathways where air moves between conditioned and unconditioned spaces. Common leak sites include:
- Top plates where interior walls meet the attic floor
- Recessed light fixtures and ceiling fans that penetrate the ceiling plane
- Plumbing, electrical, and HVAC penetrations through floors and ceilings
- Attic hatches, pull-down stairs, and kneewall doors
- Chimney and flue chases, plus furnace and water heater flue penetrations
- Rim joists and band joists at the top and bottom of exterior walls
- Crawlspace hatches, dryer vents, and outdoor faucet penetrations
Once these pathways are sealed with caulk, spray foam, rigid foam board, or weatherstripping, insulation can perform as designed. Duct sealing follows a similar logic: seal the ducts before adding duct insulation, because insulation does not stop leaks. In fact, insulating leaky ducts can sometimes make problems worse by hiding the leaks from future inspections. A proper sequence is assess, air seal, duct seal, then insulate, and finally verify with a follow-up test to confirm the improvements.
Costs, Contractors, and How to Get Competitive Bids
The cost of a whole house air sealing and duct leakage assessment varies by region, home size, and whether duct testing is included. A standalone blower door test might cost $250 to $500, while a combined blower door and duct leakage assessment typically runs $400 to $800. Some utility programs and state energy offices offer rebates or free assessments, so it is worth checking before you hire. If air sealing and duct sealing work follows the assessment, expect to pay $1,500 to $4,500 for a typical single-family home, depending on the extent of the leaks and the accessibility of the attic and crawlspace.
Hiring the right contractor matters as much as the assessment itself. Look for companies that specialize in home performance or building science, not just general HVAC or insulation. Ask whether the technician holds certifications such as BPI Building Analyst or HERS Rater, and request sample reports so you can see how findings are documented. Get at least three quotes and compare the scope of work line by line. A low bid that skips duct testing or omits a follow-up verification test is not a bargain. On the other hand, a higher bid that includes diagnostic testing, prioritized recommendations, and post-work verification may deliver better long-term value. If you want a faster way to compare vetted local contractors without calling every company in town, you can request free quotes from local pros and review multiple proposals side by side.
Before signing any contract, confirm that the contractor carries general liability insurance and workers compensation coverage. Ask for a written scope that specifies which leaks will be addressed, what materials will be used, and whether a post-repair blower door or duct leakage test is included. A reputable contractor will welcome these questions and provide clear answers. Also ask about warranty terms: some companies guarantee their air sealing work for several years, while others offer only a limited labor warranty. The warranty is a signal of how confident the contractor is in the quality of the work.
When to Schedule an Assessment and What to Do with the Results
There are several situations where an air sealing and duct leakage assessment delivers immediate value. If your utility bills have risen faster than expected, if certain rooms are consistently uncomfortable, or if you are planning to replace your HVAC system, an assessment should come before you make equipment decisions. Replacing a furnace or air conditioner without addressing duct leakage is like buying a high-efficiency car and driving it with the parking brake on. The equipment cannot perform to its rated efficiency if the distribution system is losing a third of its air.
Other good times to schedule an assessment include buying a previously owned home, finishing a basement or attic, or recovering from a major renovation where walls and ceilings were opened. Even routine maintenance is a good trigger: if you are already having your HVAC system serviced, adding a duct leakage test to the visit is cost-effective because the technician is already on site.
Once you have the report, prioritize repairs by cost-effectiveness. Envelope air sealing at the attic floor and rim joists usually delivers the highest return because those areas are accessible and the leaks are significant. Duct sealing in attics and crawlspaces comes next, especially on the supply side where leaks dump conditioned air directly into unconditioned space. Insulation upgrades follow, and window replacement typically comes last because it is expensive relative to the energy savings it delivers. A good contractor can help you phase the work over one or two years so the spending stays manageable.
Finally, keep your assessment report with your home records. If you sell the house, documented air sealing and duct leakage improvements can be a selling point. If you apply for utility rebates or energy-efficiency tax credits, the pre- and post-assessment numbers are often required as proof of performance. And if you ever have a dispute with a contractor about whether the work was done properly, the measured results provide objective evidence. A whole house air sealing and duct leakage assessment is not just a one-time test; it is a baseline that guides every energy decision you make for years to come.