
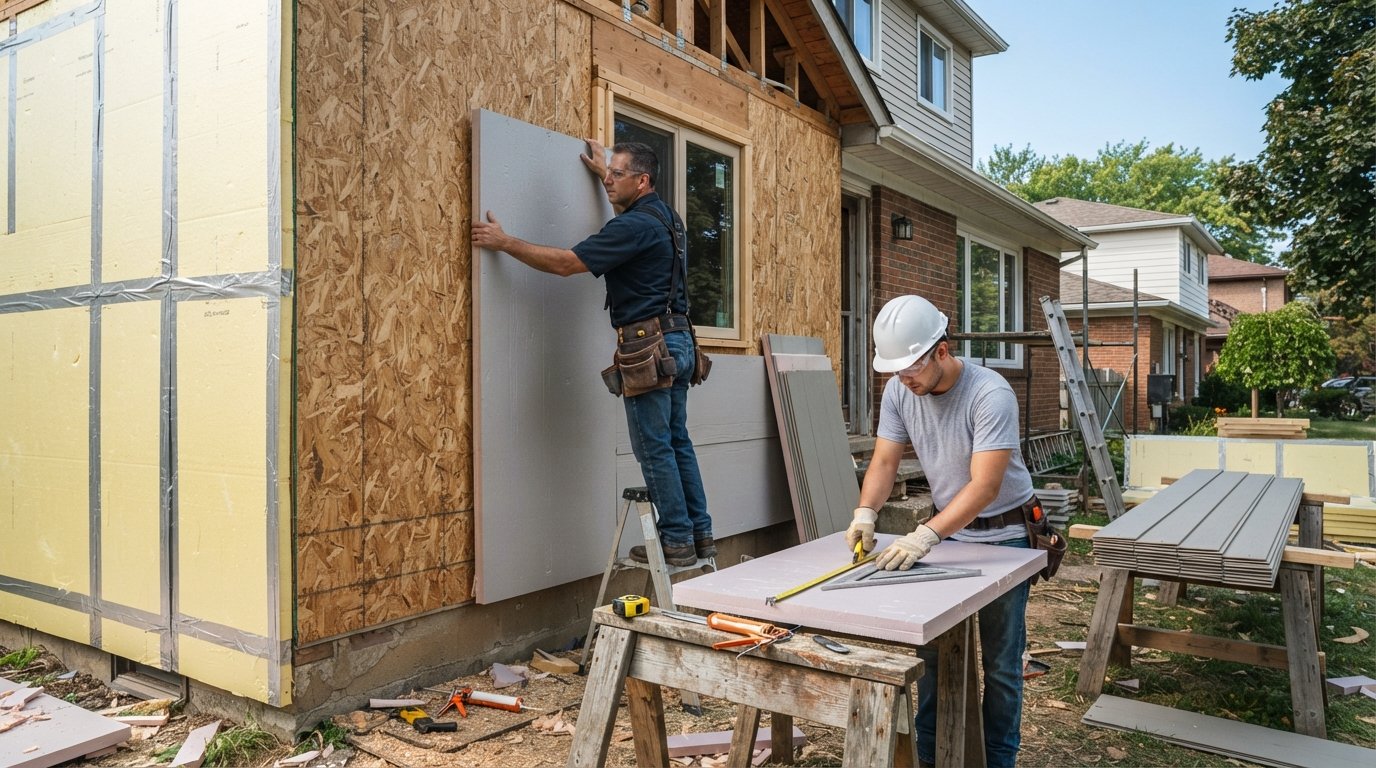
Exterior Insulation Installation Cost for Energy Savings
Exterior insulation installation cost for energy savings breaks down by material, climate zone, and siding bundle. Call (833)-365-8755 for a free quote.
Learn more about Insulation Installation or Upgrade for guides, costs, and what to expect.
Compare Insulation Installation or Upgrade Pros Near You

Enter your ZIP code to compare top-rated local professionals and request free quotes.
If you are planning a siding replacement, you are already paying for the most expensive part of an exterior insulation project: the labor to remove and reinstall your home's cladding. That is why smart homeowners and property managers treat exterior insulation as a decision that belongs inside the siding conversation, not as a separate upgrade. The exterior insulation installation cost for energy savings is not just a line item for foam boards; it is a bundled investment that can lower heating and cooling bills, reduce moisture problems, and improve comfort in rooms that never seem to stay warm. This guide breaks down the real numbers, the climate thresholds where the math works, and the mistakes that can turn a good idea into a costly retrofit.
What Exterior Insulation Actually Costs Per Square Foot
Exterior insulation pricing is usually quoted per square foot of wall area, and the range is wide because materials behave differently and installation complexity varies by home. Rigid foam boards are the most common choice for exterior retrofits because they are lightweight, easy to cut, and provide solid R-value per inch. Mineral wool panels cost more but offer better fire and sound performance. Insulated siding panels combine cladding and insulation in one product, which can simplify installation but limits your design choices.
For a typical single-family home with 1,500 to 2,500 square feet of exterior wall area, here is what you can expect to pay for the insulation portion alone, excluding siding materials and major structural repairs:
- Rigid foam board (EPS or XPS): $1.50 to $3.50 per square foot installed, depending on thickness and whether the installer needs to add furring strips.
- Polyisocyanurate (polyiso) rigid board: $2.00 to $4.00 per square foot installed, offering higher R-value per inch than EPS or XPS.
- Mineral wool exterior panels: $3.00 to $6.00 per square foot installed, with premium pricing for density and moisture resistance.
- Insulated siding panels (foam-backed vinyl or composite): $4.00 to $8.00 per square foot installed, including the cladding itself, which can be cost-effective when you are replacing siding anyway.
These figures are national averages and will vary by region, access difficulty, and the number of penetrations (windows, doors, hose bibs, electrical boxes) that need careful flashing. The exterior insulation installation cost for energy savings becomes more attractive when you pair it with a siding replacement because the scaffolding, removal, and disposal costs are shared. If you are still in the planning phase, our complete guide to solar energy installation and costs explains how to evaluate payback periods for other energy upgrades, and the same logic applies here: bundle work when the labor overlap is high.
Why Pairing Insulation With Siding Cuts Your Total Bill
The single biggest cost driver in any exterior insulation project is not the foam; it is the labor to access the wall, remove existing siding, install the insulation, and then re-clad the house. When you install exterior insulation as a standalone project, you pay for siding removal and reinstallation separately. When you fold it into a siding replacement, those costs are already sunk. Contractors can install rigid foam over the sheathing, tape the seams, add furring strips for drainage and attachment, and then hang the new siding in one continuous workflow.
This bundling effect can reduce the incremental cost of the insulation by 30 to 50 percent compared with a standalone retrofit. For example, a homeowner replacing 2,000 square feet of vinyl siding might pay $12,000 to $18,000 for the siding alone. Adding 1-inch polyiso boards might add $4,000 to $6,000, but doing the insulation as a separate project six months later could cost $8,000 to $12,000 because of the second round of removal, disposal, and trim work. The exterior insulation installation cost for energy savings is therefore most favorable when it rides along with a planned cladding upgrade.
There is also a quality advantage to bundling. When the siding is off, your contractor can inspect the sheathing, seal air leaks around windows and doors, and correct any rot or moisture damage before the insulation goes on. That inspection is difficult and expensive to perform later. If you are comparing bids for siding work, ask each contractor to quote the insulation as a separate line item so you can see the incremental cost clearly. Our guide on planning a stress-free move with professional relocation resources is useful if your project timeline overlaps with a relocation, since moving and renovation schedules often collide.
R-Value Gains and Climate Zones: Where It Pays Back
Exterior insulation improves the thermal performance of your wall assembly by adding a continuous layer outside the sheathing. Unlike cavity insulation, which is interrupted by studs, exterior rigid board creates a thermal break that reduces heat loss through framing. The energy savings depend on your climate zone, your current wall assembly, and your fuel costs. In general, homes in colder climates (zones 5 through 8) see the fastest payback because heating demand is high and the temperature difference across the wall is large. Homes in mixed climates (zones 3 and 4) still benefit, especially if the existing walls are under-insulated or have significant air leakage.
Here is a practical framework for evaluating whether the exterior insulation installation cost for energy savings makes sense in your area:
- Identify your climate zone. The U.S. Department of Energy maps zones 1 through 8. Zones 5 and above generally justify thicker exterior insulation (2 inches or more of rigid foam) because the heating season is long.
- Estimate your current wall R-value. A 2x4 wall with fiberglass batts is roughly R-13; a 2x6 wall is roughly R-19 to R-21. Add exterior foam to reach the recommended total R-value for your zone.
- Calculate the incremental cost per R. Divide the added insulation cost by the R-value gained. Polyiso usually delivers the lowest cost per R among rigid boards, while mineral wool costs more but offers other benefits.
- Compare against projected energy savings. A qualified energy auditor can model your home and estimate annual savings. As a rough rule, adding R-5 to R-10 of continuous exterior insulation can reduce heating and cooling costs by 10 to 20 percent in under-insulated homes.
Payback periods typically range from 5 to 12 years when insulation is bundled with siding, and longer when it is a standalone project. The exterior insulation installation cost for energy savings is not just about utility bills; it also protects against moisture accumulation in the wall cavity, which can extend the life of your sheathing and framing. In humid climates, the moisture management benefit alone can justify the investment.
Moisture Management and Vapor Barrier Mistakes to Avoid
Exterior insulation changes the temperature profile of your wall assembly, and that can create moisture problems if the details are wrong. The most common mistake is installing a vapor barrier in the wrong location or doubling up on vapor retarders. In cold climates, the vapor retarder should be on the warm side of the insulation, which is typically the interior. When you add exterior foam, the sheathing stays warmer, which reduces the risk of condensation, but you still need to manage bulk water and air leakage.
Another frequent error is skipping the drainage plane. Exterior insulation boards should be installed with a weather-resistive barrier behind them and furring strips or a rainscreen system in front to allow water to drain away. Taping the seams of rigid foam is essential, but the tape must be compatible with the board facing and rated for exterior use. Flashing around windows and doors must integrate with the insulation layer, not just the sheathing. If your contractor proposes to caulk the insulation edges instead of using proper flashing, that is a red flag.
Permeability matters too. Some rigid foams are impermeable, which can trap moisture against the sheathing if the assembly is not designed correctly. In mixed and cold climates, many builders prefer a semi-permeable exterior insulation or a strategy that allows the wall to dry to the exterior. The exterior insulation installation cost for energy savings can be wiped out by moisture damage if these details are ignored, so ask your contractor to explain the wall assembly from the inside out and confirm that the vapor profile is appropriate for your climate.
How to Get Accurate Quotes and Avoid Surprise Costs
Because exterior insulation pricing varies so much by region and project specifics, the only reliable way to know your number is to get multiple itemized quotes. Ask each contractor to break out the insulation material, labor, furring strips, flashing, trim, and disposal separately. That way you can compare apples to apples and see whether one bid is cheaper because it is skipping a critical step like drainage detailing.
Before you request quotes, gather a few basics: the square footage of your exterior walls, the type of existing siding, the age of the home, and any known moisture issues. If you are also considering other energy upgrades, such as solar, our solar installation cost guide can help you prioritize projects with the best return. ContractorHomeQuotes connects homeowners with pre-screened, licensed local contractors who can provide free, no-obligation quotes for siding and insulation projects. You can compare bids side by side and ask questions without pressure.
The exterior insulation installation cost for energy savings is ultimately a case-by-case calculation. Homes with under-insulated walls, high energy bills, and a planned siding replacement are the strongest candidates. Homes in mild climates with well-insulated walls may see longer paybacks, but the comfort and moisture benefits can still justify the investment. The key is to treat the insulation as part of the siding project, not as an afterthought, and to insist on proper moisture detailing from day one.