
Radon Testing Cost: DIY vs Professional Options
Compare radon testing cost and DIY versus professional options, then call (833)-365-8755 for help finding qualified local testers and mitigators.
By Adnan Nazir
Learn more about Air Quality and Environmental Testing for guides, costs, and what to expect.
Compare Air Quality and Environmental Testing Pros Near You

Enter your ZIP code to compare top-rated local professionals and request free quotes.
Radon is a colorless, odorless radioactive gas that seeps into homes from the soil, and it is the leading cause of lung cancer among nonsmokers in the United States. The only way to know if your home has elevated levels is to test. But when homeowners start researching radon testing cost and DIY versus professional options, they often get stuck comparing a $15 hardware store kit against a $150 to $300 professional service. The price gap is real, but so is the difference in reliability, convenience, and what happens after the test. This guide breaks down the actual costs, the science of test placement, and the decision framework that helps you choose the right approach for your home and your risk tolerance.
What Radon Testing Actually Involves (and Why It Matters)
Radon forms when uranium in soil, rock, and water breaks down. It moves upward through the ground and enters homes through cracks in foundations, gaps around pipes, sump pumps, and unfinished basements. Because it is invisible and has no smell, testing is the only detection method. The EPA estimates that about 1 in 15 homes in the U.S. has elevated radon levels, and the surgeon general recommends testing all homes below the third floor, regardless of age or construction style.
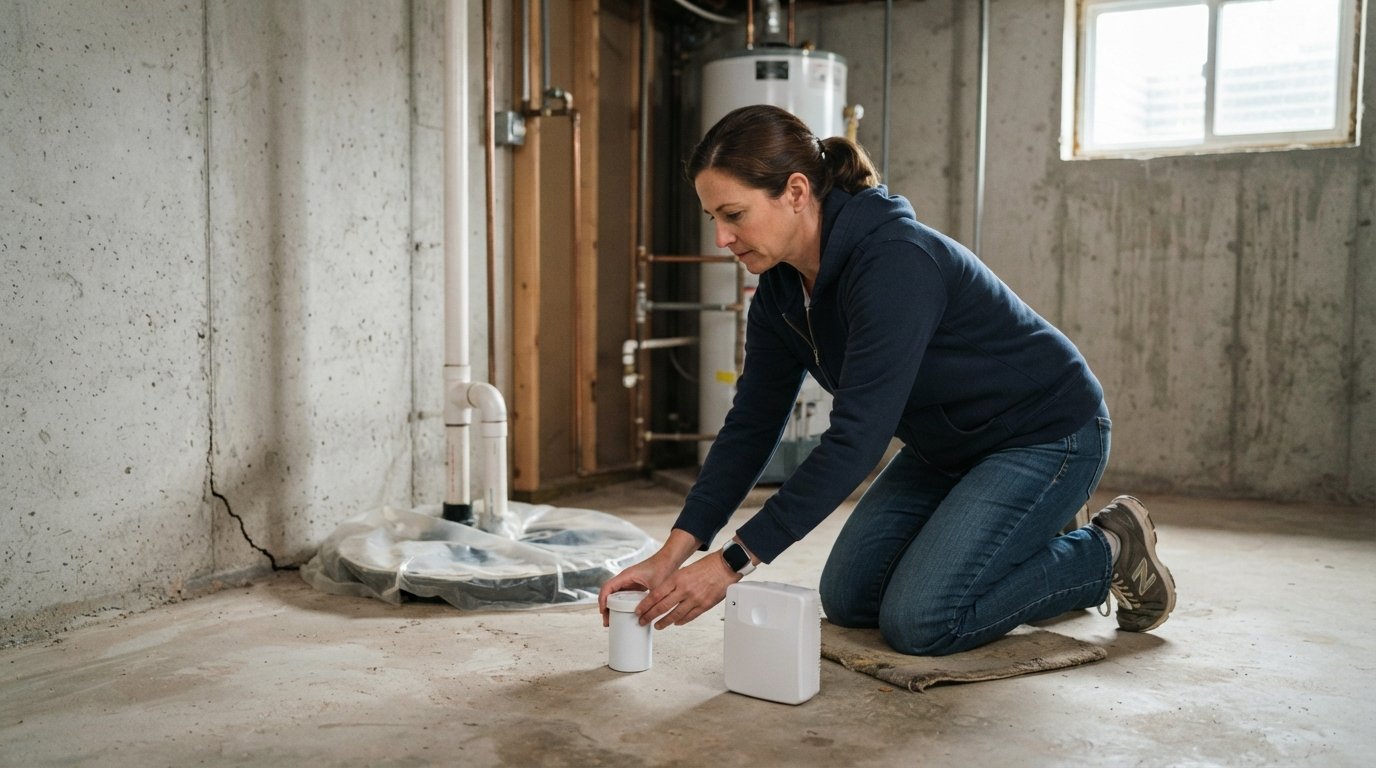
The testing process itself is straightforward: you place a measurement device in the lowest livable level of the home, leave it undisturbed for a set period, then send it to a lab or read the results. The complexity comes from the variables that affect accuracy: test duration, closed-house conditions, device placement, and seasonal timing. A test that ignores these variables can produce a false sense of security or an unnecessarily alarming result.
Radon levels fluctuate daily and seasonally. A short-term test run during a windy week with open windows may read lower than the home's actual year-round average. That is why the EPA recommends short-term tests for initial screening (2 to 90 days) and long-term tests (more than 90 days, ideally 12 months) when you need a definitive annual average. Understanding this distinction is the first step in evaluating any radon testing cost and DIY versus professional options comparison.
DIY Radon Testing Costs: Kits, Monitors, and Hidden Tradeoffs
DIY radon testing is the most affordable entry point. A basic short-term activated charcoal kit typically costs $15 to $30 at hardware stores or online, and that price usually includes lab analysis and a prepaid return mailer. You place the kit, wait 48 to 96 hours, ship it back, and receive results by email or mail within a week or two. For a homeowner who wants a quick yes-or-no screening, this is hard to beat on price.
Continuous radon monitors are the next tier. These electronic devices sit in your home and log hourly readings, giving you a graph of radon levels over time. Prices range from $100 to $250 for consumer-grade monitors, and some models can be rented for $30 to $60 per week. Monitors are useful for tracking seasonal patterns or verifying that a mitigation system is working, but they require calibration and careful placement to be trustworthy.
Here is where the hidden costs of DIY appear. A single charcoal kit gives you one data point. If your result is borderline (between 2 and 4 pCi/L), you will likely need a follow-up test, which means another kit or a long-term test. If you sell your home, a buyer's agent may not accept a DIY kit result as verification, and you may end up paying for a professional test anyway. And if you misplace the kit, run it during a thunderstorm with windows open, or place it in a bathroom or kitchen, the result is compromised and you have wasted both money and time.
- Charcoal kit: $15 to $30, includes lab fees, 2 to 7 day turnaround, best for quick screening.
- Continuous monitor: $100 to $250 to buy or $30 to $60 per week to rent, best for ongoing tracking.
- Long-term kit (alpha track or electret): $25 to $50, runs 90 days to a year, best for definitive averages.
- Hidden costs: repeat tests, shipping delays, and results that may not satisfy real estate transactions.
For homeowners who are comfortable following instructions and who mainly want a fast screening number, DIY kits are a sensible first step. The key is to treat the first test as a screening tool, not a final verdict, and to budget for a confirmatory test if the result is anywhere near the action level.
Professional Radon Testing Costs: What You Pay For
Professional radon testing typically costs $150 to $300 for a short-term test and $300 to $500 or more for a long-term test or a real estate transaction test. The price includes a trained technician who places the device according to EPA protocols, maintains closed-house conditions, retrieves the device, and delivers a report that is defensible for real estate, lending, and mitigation decisions. In some states, radon measurement professionals must be licensed or certified, which adds a layer of accountability that a hardware store kit cannot match.
The value of professional testing is not just the device. It is the protocol. A qualified tester knows to place the device in the lowest livable level, avoid areas with high humidity or drafts, maintain closed-house conditions for at least 12 hours before and during the test, and document the conditions. If you are buying or selling a home, a professional test report carries weight with lenders, inspectors, and attorneys in a way that a DIY kit receipt does not. Many real estate contracts specifically require testing by a certified professional.
Professional testing also connects directly to the next step: mitigation. If levels are elevated, a professional tester can explain the results in context, recommend whether a follow-up test is needed, and refer you to licensed mitigation contractors. That continuity matters because radon mitigation systems typically cost $800 to $2,500, and you want the decision to be based on a reliable measurement, not a questionable one. For homeowners planning larger projects, understanding how to budget for contingencies is just as important as the test itself; our guide on how a project cost estimation platform saves homeowners money explains how to build a realistic reserve for surprises like this.
DIY vs Professional Radon Testing: A Decision Framework
The right choice depends on why you are testing and what you plan to do with the result. A homeowner who simply wants to know whether radon is a concern can start with a DIY kit and escalate only if needed. A homeowner in a real estate transaction, or one who has already had an elevated result and needs confirmation, is usually better served by a professional test. The table below summarizes the tradeoffs, but the decision framework is more useful than any single price point.
- Screen first if you are curious and cost-sensitive. Buy a short-term charcoal kit for $15 to $30, follow the placement instructions carefully, and use the result to decide whether further action is warranted.
- Go professional if the stakes are high. Real estate transactions, post-mitigation verification, and any situation where you need a legally defensible result justify the $150 to $300 professional fee.
- Use a long-term test for a definitive answer. If your short-term result is between 2 and 4 pCi/L, a long-term test (DIY or professional) gives you the annual average you need to decide on mitigation.
- Confirm before you mitigate. Never install a mitigation system based on a single short-term DIY kit. A follow-up test, ideally professional, protects you from spending $800 to $2,500 on a system you may not need.
One practical compromise is to use a DIY kit for the initial screen and hire a professional only if the result is at or above 4 pCi/L, the EPA action level. That approach keeps your upfront cost low while ensuring that the decision to mitigate is based on a reliable measurement. If you are also considering larger home improvements, it helps to think about radon testing the same way you think about other project estimates: get a clear number, verify it, and then budget accordingly. For homeowners exploring energy upgrades alongside safety improvements, resources like free solar power quotes can help you compare options without obligation, though radon should always be addressed first because it is a health issue, not just an efficiency one.
How to Interpret Results and Decide on Mitigation
Radon results are reported in picocuries per liter (pCi/L). The EPA action level is 4 pCi/L, meaning you should consider mitigation if your long-term average is at or above that level. The World Health Organization recommends action at 2.7 pCi/L, and many health experts suggest mitigating at 2 pCi/L if you are a nonsmoker or have children in the home. The key word is average: a single short-term reading of 4.5 pCi/L is a signal to test again, not necessarily a mandate to install a system.
If your result is elevated, the next step is a follow-up test, ideally a long-term test or a professional short-term test with closed-house conditions. If the confirmatory result is at or above 4 pCi/L, you should obtain quotes from licensed radon mitigation contractors. A typical mitigation system uses a vent pipe and fan to draw soil gas from beneath the foundation and exhaust it above the roofline. Costs range from $800 to $2,500 depending on home design, foundation type, and local labor rates, and many systems include a post-installation test to verify effectiveness.
Do not skip the post-mitigation test. Even a well-installed system can underperform if the fan fails or the piping is not sealed properly. A follow-up test, usually included in the installation contract, confirms that levels have dropped below the action level. If you are comparing contractors for mitigation or any other home project, our contractor selection resources can help you verify licenses, insurance, and references before you sign.
Placement Rules and Timing: Getting the Test Right
Whether you choose DIY or professional testing, the accuracy of the result depends on following placement and timing rules. The EPA recommends placing the test device in the lowest livable level of the home, which is often the basement or first floor. Do not test in a bathroom, kitchen, laundry room, or hallway with high humidity, and keep the device at least 20 inches off the floor, 4 inches from walls, and away from drafts, exterior walls, and direct sunlight.
Closed-house conditions are critical for short-term tests. Windows and exterior doors should be closed for at least 12 hours before the test begins and remain closed during the test, except for normal entry and exit. Central heating and cooling systems can run normally, but avoid using fans that bring in outdoor air. Test during the heating season if possible, because radon levels tend to be higher when the ground is frozen and the house is closed up. If you are testing for a real estate transaction, follow the protocol required by your state or the buyer's lender, which may specify a minimum test duration and a certified tester.
Long-term tests are less sensitive to daily fluctuations but still require careful placement. Leave the device undisturbed for at least 90 days, ideally across a full heating season, and do not move it or open windows excessively. If you are using a continuous monitor, check that it is calibrated and that the data log covers the full test period. A monitor that loses power or is moved mid-test produces unreliable data, which defeats the purpose of paying for a more expensive device.
Radon Testing Cost and DIY Versus Professional Options: The Bottom Line
Radon testing cost and DIY versus professional options come down to a simple tradeoff: you can save $100 to $250 upfront with a DIY kit, but you accept more responsibility for protocol, interpretation, and follow-up. For a curious homeowner, that tradeoff is often worth it. For a real estate transaction, a post-mitigation verification, or any situation where the result will drive an $800 to $2,500 mitigation decision, professional testing is the safer choice.
A practical strategy is to screen with a DIY kit, confirm with a long-term test or a professional test if the result is near the action level, and only then move to mitigation. That sequence keeps your costs low while ensuring that any major decision is based on reliable data. Radon is a health issue, not just a home maintenance item, so the goal is not to find the cheapest test but to get a trustworthy answer and act on it appropriately.
Learn more about Air Quality and Environmental Testing for guides, costs, and what to expect.
Compare Air Quality and Environmental Testing Pros Near You
Enter your ZIP code to compare top-rated local professionals and request free quotes.