
Radon Mitigation System Installation Cost and Testing Guide
Radon mitigation system installation cost and testing explained: average prices, what drives quotes, and how to budget for a safer home.

By Alexia Mabel
Learn more about Radon Mitigation for guides, costs, and what to expect.
Compare Radon Mitigation Pros Near You

Enter your ZIP code to compare top-rated local professionals and request free quotes.
Radon is an invisible, odorless gas that seeps into homes from the soil, and it is the second leading cause of lung cancer in the United States. If you have received a high radon test result, or you are buying a home in a radon-prone zone, you are likely facing two urgent questions: how much does a radon mitigation system cost to install, and how much does testing cost? This guide breaks down the full financial picture, from the initial test kit to the finished system, so you can budget with confidence and avoid surprise bills.
Radon mitigation is not a glamorous home improvement project, but it is one of the most important investments you can make for your family's health. The good news is that the costs are predictable and often far lower than homeowners expect. Whether you need a simple sub-slab depressurization system or a more complex design for a crawl space, understanding the components and labor involved will help you evaluate contractor bids fairly.
Why Radon Testing Comes Before Any Installation Cost Discussion
You cannot choose a mitigation system or estimate its cost without a reliable radon test. The EPA recommends testing all homes below the third floor, regardless of geographic location. Testing is inexpensive, and it establishes the baseline radon level that determines whether mitigation is needed at all. Without a test, any installation quote is guesswork.
There are two main testing options for homeowners. Short-term tests take two to seven days, while long-term tests run for 90 days or more and provide a more accurate annual average. For real estate transactions, a short-term test is common, but if you are living in the home and planning ahead, a long-term test gives you better data. Many states offer free or discounted test kits through their radon programs, and professional testing services typically charge between $150 and $300.
If your test result is 4 picocuries per liter (pCi/L) or higher, the EPA recommends mitigation. Some homeowners also choose to mitigate at levels between 2 and 4 pCi/L as a precaution. Once you have a confirmed high reading, you can move forward with obtaining installation quotes.
How Much Does Radon Mitigation System Installation Cost?
Across the United States, the average cost to install a radon mitigation system ranges from $800 to $2,500, with most homeowners paying around $1,200. The final price depends on your home's foundation type, the severity of the radon problem, local labor rates, and the complexity of the routing. A standard sub-slab depressurization system in a basement with a nearby vent location sits at the lower end, while systems requiring multiple suction points or long pipe runs push toward the higher end.
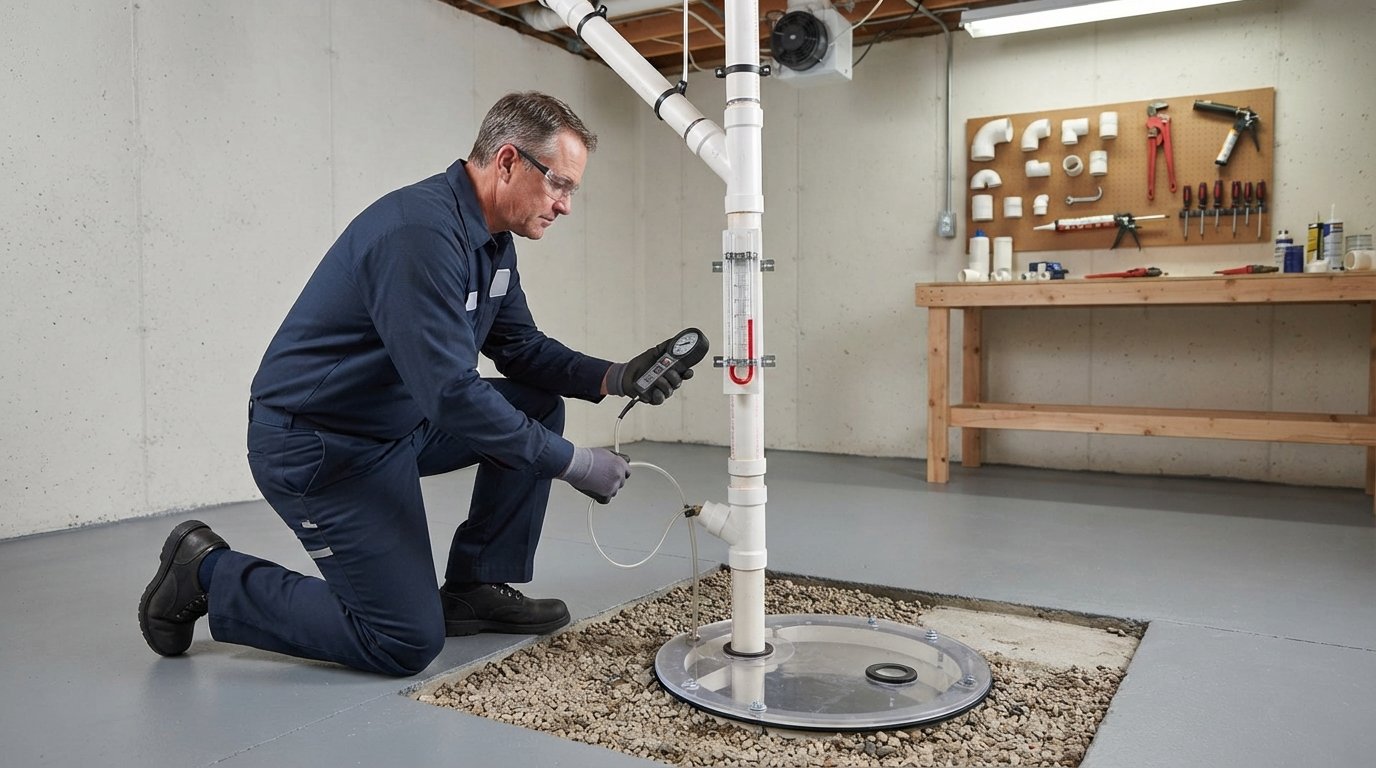
It helps to think of the project in terms of its core components. A typical system includes a PVC pipe network, a radon fan, a manometer to monitor pressure, sealing materials for cracks and sump lids, and a vent that terminates above the roofline. The fan is the only moving part and typically costs between $150 and $400 on its own. Labor, permits, and diagnostic testing make up the rest of the bill.
Here is a quick breakdown of what drives the total installation cost:
- Foundation type: Basements and slab-on-grade homes are usually the simplest and least expensive. Crawl spaces and homes with dirt floors may require a different approach, such as sub-membrane depressurization, which adds cost.
- Number of suction points: A single suction point often suffices, but larger or irregular foundations may need two or more, increasing both materials and labor.
- Routing and venting: If the vent pipe can run up an interior wall and out the roof, costs stay moderate. Routing through finished spaces or around obstructions adds labor.
- Electrical work: The fan needs a power source. If an outlet is not nearby, an electrician may need to run a dedicated circuit, adding $150 to $400.
- Permits and inspections: Some states and municipalities require permits and post-installation testing, which can add $50 to $200.
It is also worth noting that radon mitigation is a specialty trade. Not every general contractor is qualified to design and install a system that meets EPA standards and local building codes. Hiring a certified radon professional ensures the system is properly sized and that the work passes inspection. If you are comparing bids, ask each contractor to explain their design rationale and provide proof of certification.
For homeowners who are also planning larger energy or air-quality upgrades, it can be helpful to see how other installation projects are priced. Our guide to solar energy installation covers cost factors that follow a similar logic: equipment, labor, permits, and site-specific conditions. The same principle applies to radon: the more complex the site, the higher the quote.
What Affects the Final Price: Regional and Home-Specific Variables
Radon mitigation costs vary significantly by region. States with high radon potential, such as Iowa, Pennsylvania, and Colorado, tend to have more competition among certified mitigators, which can keep prices competitive. In areas with fewer specialists, you may pay a premium for travel and limited availability. Urban labor rates are generally higher than rural rates, and coastal markets often see higher prices across all trades.
Your home's age and construction also matter. Older homes may have unsealed sump pumps, exposed dirt crawl spaces, or foundation cracks that require extra sealing. Newer homes with tight construction may need a different design to avoid depressurization issues. If you have a radon problem in a finished basement, the installer may need to route pipes through living space, which requires careful planning and additional labor.
Another variable is whether you choose an active or passive system. Passive systems rely on natural pressure differences and are common in new construction, but they are less effective in existing homes. Active systems use a fan to continuously draw soil gas away from the foundation and vent it outside. Most retrofits are active systems, which is why they cost more upfront but deliver reliable results.
Radon Testing After Installation: Ongoing Costs and Why They Matter
Once your mitigation system is installed, you are not done with testing. Post-mitigation testing is essential to confirm the system is working and that radon levels have dropped below 4 pCi/L. Most contractors include a post-installation test in their quote, but if not, budget $100 to $200 for a professional test or $20 to $50 for a DIY kit.
Long-term, you should retest every two years, or more often if you make structural changes to your home, such as finishing a basement or installing a new HVAC system. The system itself requires minimal maintenance, but the fan typically lasts five to ten years and costs $150 to $400 to replace. Some homeowners also invest in a radon monitor that provides continuous readings, which costs $150 to $300 and can offer peace of mind.
It is also smart to check the system's manometer monthly. This simple U-shaped tube shows whether the fan is pulling suction. If the fluid levels are equal, the fan may have failed or the pipe may be blocked. Addressing small issues early prevents radon from creeping back into your home.
How to Get Accurate Quotes and Avoid Overpaying
Getting multiple quotes is the single best way to ensure you are paying a fair price for radon mitigation. Because the work is specialized, prices can vary widely between contractors. Aim for at least three written estimates that clearly separate labor, materials, and any optional add-ons. A reputable contractor will also perform a diagnostic test before quoting, which may include a communication test to determine how easily soil gas moves through your foundation.
When you review bids, do not automatically choose the lowest number. Look for a detailed scope of work, a guarantee that the system will reduce radon below 4 pCi/L, and proof of insurance and certification. Ask about the warranty on the fan and labor, and confirm whether the price includes post-installation testing and any required permits.
If you want to streamline the process of finding qualified professionals, you can use a free quote request service like FreeQuotes.Contractors to connect with pre-vetted local contractors. This type of platform allows you to compare multiple bids side by side without spending hours on the phone. Just be sure to verify each contractor's radon credentials independently, since not all general contractors specialize in mitigation.
Finally, check whether your state or local health department offers financial assistance for radon mitigation. Some programs provide grants or low-interest loans for income-qualified households, and a few states offer free mitigation for certain residents. A quick call to your state radon office can reveal options that reduce your out-of-pocket cost.
Budgeting for the Full Picture: Testing, Installation, and Beyond
To summarize the financial roadmap, here is a realistic budget range for a typical home:
- Initial radon test: $20 to $300, depending on whether you use a DIY kit or hire a professional.
- Mitigation system installation: $800 to $2,500, with most homeowners paying around $1,200.
- Post-mitigation test: $100 to $200 if not included in the installation quote.
- Ongoing maintenance: $150 to $400 every five to ten years for a replacement fan, plus occasional retesting.
When you look at the total, radon mitigation is a relatively small price to pay for a significant health benefit. The cost of installation is a one-time expense, and the system runs quietly in the background with minimal upkeep. Compared to the potential cost of lung cancer treatment or the loss of property value from an unmitigated radon problem, the investment is well justified.
Remember that radon levels can fluctuate, so a single test is just a snapshot. If you are planning a major renovation, such as a basement finish or an addition, consider testing again afterward. Structural changes can alter how radon enters your home, and your mitigation system may need adjustments to keep up.
By understanding the costs and the steps involved, you can approach radon mitigation with confidence. Start with a test, gather multiple quotes from certified professionals, and budget for both installation and ongoing testing. Your future self, and your family, will thank you.