
Post Renovation Cleanup Checklist and Maintenance Guide
A structured post renovation cleanup checklist and maintenance plan protects your investment and prevents costly damage. Call (833)-365-8755 for trusted local help.

By Alexia Mabel
Learn more about House Cleaning for guides, costs, and what to expect.
Compare House Cleaning Pros Near You

Enter your ZIP code to compare top-rated local professionals and request free quotes.
The last contractor has packed up, the dumpster is gone, and you are standing in a beautiful new space that is somehow still covered in a fine layer of grit. That moment, somewhere between triumph and exhaustion, is exactly when the post renovation cleanup checklist and maintenance plan you follow will determine whether your investment looks and performs well for years or starts showing premature wear within months. Construction dust is not ordinary household dust. It contains drywall particles, silica, wood fibers, paint overspray, and adhesive residue that settle into every crevice and get pulled through your HVAC system every time the air handler runs. Paint, grout, and caulk are still curing. New plumbing and electrical systems have not yet been stress-tested by daily use. And the paperwork that protects your warranty and resale value is sitting in a pile somewhere. A structured approach to cleanup and first-year maintenance solves all of these problems in the right order.
Why Post Renovation Cleanup Is Different From Regular Cleaning
Standard cleaning routines are designed for household dust, which is mostly dead skin cells, fabric fibers, and outdoor particulate. Post-construction dust is heavier, more abrasive, and chemically active. Drywall dust in particular has a fine, chalky consistency that passes through standard vacuum filters and settles back into the air within minutes. If you run a regular vacuum without a HEPA filter, you are essentially redistributing the dust rather than removing it. Silica particles from concrete cutting and sanding are a known respiratory hazard and should never be handled with a broom alone, because sweeping launches them back into the breathing zone.
Beyond dust, renovation sites leave behind chemical residues. Adhesive films from protective plastic sheeting, paint overspray on glass and fixtures, grout haze on tile, and silicone smears on surfaces all require specific removal methods. Using the wrong product can etch glass, dull stone, or strip a fresh finish. The order of operations matters too: if you clean floors before wiping down walls and ceilings, dust will simply fall back onto the clean floor. Working top to bottom, dry methods before wet methods, and HVAC protection before final detailing is the sequence that professional cleaners follow, and it is the sequence that saves you the most time and frustration.
Timing is equally important. Freshly applied grout needs 24 to 72 hours to cure before it can handle moisture. Caulk needs at least 24 hours and often longer in humid conditions. Paint needs 7 to 30 days to fully cure, even though it feels dry to the touch within hours. Heavy scrubbing or excessive moisture during these windows can compromise the material and void manufacturer warranties. Your cleanup schedule should respect these cure times rather than fighting them.
Your Room-by-Room Post Renovation Cleanup Checklist
A systematic cleanup prevents the frustration of finding dust in a supposedly finished room three weeks later. The checklist below is organized by priority: HVAC protection first, then dry removal of debris, then wet cleaning, and finally surface detailing. Each phase builds on the previous one, so resist the temptation to skip ahead.
- Protect and service the HVAC system. Replace all air filters immediately. If the system ran at any point during construction, schedule a duct inspection and cleaning with a qualified technician. Seal supply and return vents with plastic and painter's tape until the final cleaning phase is complete.
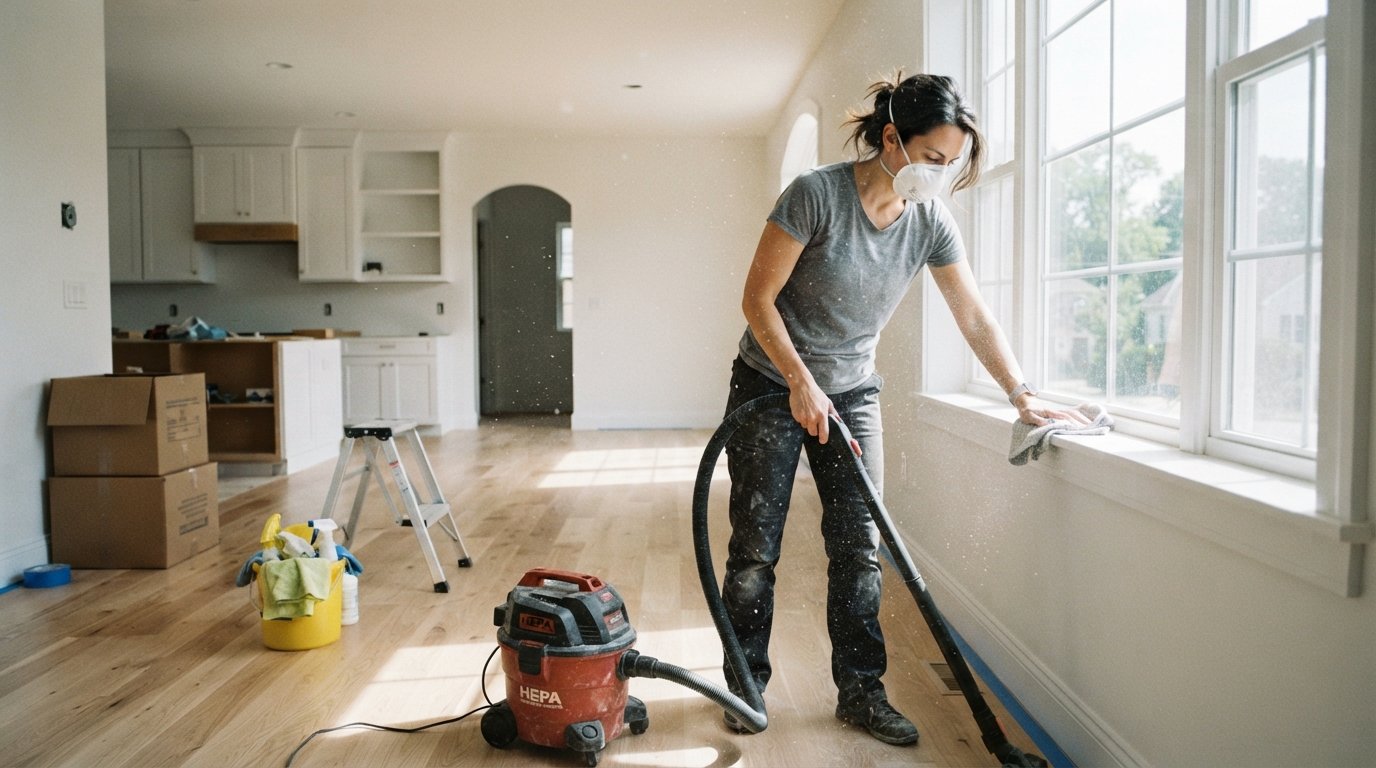
- Remove all construction debris and large particles. Haul out leftover materials, packaging, and scraps. Use a HEPA vacuum or a shop vacuum with a fine-particle filter for drywall dust. Never use a standard broom on drywall dust unless you first mist the area lightly with water to weigh down particles.
- Clean from the ceiling down. Wipe light fixtures, ceiling fans, crown molding, and wall tops with a damp microfiber cloth. Change the rinse water frequently. In rooms with textured ceilings, use a vacuum brush attachment instead of a wet cloth to avoid smearing.
- Detail walls, windows, and fixtures. Remove paint overspray from glass with a plastic razor blade and a dedicated adhesive remover. Wipe grout haze from tile with a pH-neutral cleaner. Remove silicone smears with a solvent approved for the surface. Clean switch plates, outlet covers, and door hardware last.
- Finish with floors and air quality. Vacuum floors twice, then mop with a cleaner appropriate for the material. Run a HEPA air purifier in each room for 24 to 48 hours. Replace HVAC filters again after the final cleaning, because residual dust will continue to circulate for several days.
Once the checklist is complete, do a white-glove test: run a clean white cloth along baseboards, window sills, and the tops of door frames. If the cloth picks up visible gray residue, repeat the wipe-down in that area. This simple test catches the hidden dust that shows up in photographs and on dark surfaces weeks later. For rooms with new tile, check the grout lines with a flashlight at a low angle, which reveals haze that normal lighting hides.
If your renovation included exterior work such as siding replacement or repair, the cleanup extends outdoors. Rinse siding from the top down with a garden hose, clear debris from gutters and downspouts, and check that drainage away from the foundation is unobstructed. Homeowners who have recently completed exterior projects in regions with variable weather may find additional guidance in resources like this siding maintenance and installation guide, which covers inspection intervals and material-specific care that complement interior cleanup routines.
HVAC, Ducts, and Air Quality: The Hidden Dust Reservoir
Your HVAC system is the single largest reservoir of construction dust in most homes, and it is also the most overlooked. Every time the blower runs, it pulls air through the return ducts, past the filter, and into every room. During a renovation, that air carries drywall dust, insulation fibers, and sawdust. The filter catches some of it, but a surprising amount bypasses the filter through gaps, settles inside ductwork, coats the blower motor, and accumulates on the evaporator coil. If you skip duct cleaning, you will continue to see dust settling on surfaces for months, and your system will run less efficiently because of restricted airflow.
Professional duct cleaning after a major renovation is almost always worth the cost. Technicians use negative-pressure equipment and rotary brushes to remove debris from the entire system, then sanitize the interior. Ask them to inspect the evaporator coil and blower compartment as well, because dust buildup in those areas can lead to frozen coils in summer and reduced heating output in winter. If your renovation involved extensive drywall work or floor sanding, duct cleaning is not optional; it is part of protecting your HVAC warranty and your indoor air quality.
Between professional cleanings, run your system with high-quality filters rated MERV 11 or higher for the first month after renovation, then step down to your normal filter rating. Portable HEPA air purifiers in bedrooms and living areas accelerate the removal of fine particulate. Change filters monthly for the first three months, then return to your regular schedule. If anyone in the household has allergies or respiratory conditions, consider a post-renovation air quality test to confirm that particulate levels have returned to normal.
Curing Timelines for Paint, Grout, and Caulk
One of the most common mistakes homeowners make after a renovation is cleaning too aggressively too soon. Fresh finishes need time to cure, and the difference between dry and cured is significant. Paint that feels dry to the touch within a few hours may take up to 30 days to reach full hardness. During that window, wiping with a damp cloth is fine, but scrubbing, using abrasive cleaners, or pressing objects against the surface can leave permanent marks. Grout needs 24 to 72 hours before it can tolerate moisture, and it should be sealed after 7 to 10 days for maximum stain resistance. Caulk needs at least 24 hours, and in humid climates, 48 hours or more before it is exposed to water.
Plan your cleaning schedule around these timelines. On day one, focus on dry dust removal and debris hauling. On day two, tackle windows, fixtures, and hard surfaces that are not freshly painted or grouted. Wait at least three days before mopping tile floors with water, and wait a full week before using any liquid cleaner on new grout. For freshly painted walls, stick to a dry microfiber cloth for the first two weeks, then switch to a barely damp cloth with mild soap. Avoid commercial degreasers and ammonia-based cleaners on new paint for at least a month.
Temperature and humidity affect cure times. In cold weather, paint and caulk cure more slowly, so extend your waiting periods. In hot, humid conditions, grout may cure faster on the surface but remain soft underneath, so do not assume that a dry-looking surface is ready for heavy cleaning. When in doubt, err on the side of waiting an extra day. The few hours you lose are trivial compared to the cost of repairing a compromised finish.
First-Year Maintenance Schedule for New Systems and Surfaces
New construction and renovation materials behave differently in their first year than they will afterward. Wood flooring expands and contracts as it adjusts to indoor humidity. New plumbing fixtures may develop minor leaks at connections as seals settle. Electrical outlets and switches get their first real workout. A first-year maintenance schedule catches small issues before they become expensive repairs and keeps warranties valid, since most manufacturers require documented maintenance.
Break the year into quarterly checkpoints. In the first month, inspect all plumbing connections under sinks and behind appliances for moisture, test every electrical outlet and GFCI with a plug tester, and check that doors and windows open and close without binding. In months two through three, re-check caulk lines around tubs, showers, and countertops for gaps or shrinkage, and tighten any loose cabinet hardware or faucet handles. At the six-month mark, clean range hood filters, vacuum refrigerator coils, and inspect the attic or crawl space for signs of moisture or pest intrusion. At twelve months, schedule a professional HVAC inspection, have the water heater flushed if it is tank-style, and review your warranty documentation to confirm that all required maintenance has been performed.
Keep a simple maintenance log with dates, tasks performed, and any receipts. This log serves two purposes: it helps you stay on schedule, and it provides proof of maintenance if you ever need to file a warranty claim or sell the home. Buyers and home inspectors treat a well-documented maintenance history as a sign of responsible ownership, which can translate into a faster sale and a stronger negotiating position.
Documenting Warranties, Permits, and Final Inspections
The paperwork generated by a renovation is as valuable as the physical work itself, and it is almost always the first thing to get lost. Building permits, inspection sign-offs, contractor licenses, warranty certificates, and material receipts all matter for resale, insurance claims, and future repairs. Without them, you may be unable to prove that work was done to code, which can complicate a sale or an insurance claim years later.
Create a renovation binder, physical or digital, with clearly labeled sections. Include the signed contract and any change orders, the final invoice and proof of payment, permit numbers and inspection records, warranty documents for appliances and materials, and a list of subcontractors with their license numbers and contact information. Photograph or scan everything and store a copy in cloud storage. If your contractor provided a lien waiver or a certificate of insurance, include those as well. When you sell the home, this binder becomes a marketing asset that demonstrates professional, permitted work.
Also confirm that final inspections have actually been completed and signed off. Some homeowners assume that because the work looks finished, the permit has been closed. In reality, an open permit can block a future sale or trigger penalties. Check with your local building department to verify that every inspection is recorded as passed and that the permit file is closed. If your contractor handled the permits, request copies of the final inspection reports for your records.
DIY Cleanup vs Hiring a Post-Construction Cleaning Crew
Deciding whether to clean up yourself or hire a professional crew depends on the scope of the renovation, the materials involved, and your available time and tolerance for dust. A small bathroom refresh with minimal drywall work is manageable for most homeowners with a HEPA vacuum and a few hours. A full kitchen remodel, an addition, or any project that involved extensive drywall sanding, floor refinishing, or ductwork modifications is a different story. Professional post-construction cleaners bring HEPA equipment, negative-air machines, and experience with delicate surfaces that most homeowners do not have.
Consider hiring a crew if any of the following apply: the project involved more than a few sheets of drywall, the HVAC system ran during construction, there are natural stone or specialty surfaces that require specific products, or you have health concerns such as asthma or allergies. Professional cleaning typically costs a few hundred to a few thousand dollars depending on square footage and complexity, which is a small fraction of the renovation budget and a worthwhile investment in protecting finishes and indoor air quality. If you do hire a crew, schedule them after all trades have finished and after cure times have elapsed, and walk the space with the supervisor before they begin to set expectations.
If you decide to handle cleanup yourself, invest in the right tools before you start: a HEPA vacuum, microfiber cloths in bulk, a plastic razor blade set, pH-neutral cleaner, and a step ladder. Renting a commercial air scrubber for a few days can dramatically reduce airborne dust. For homeowners planning to move soon after a renovation, coordinating the cleanup with the move itself can reduce stress; resources such as Moving.Homes offer checklists and planning guides that help sequence cleaning, packing, and relocation so that your new space is ready when you arrive. Whichever route you choose, do not rush the final phase. A thorough cleanup protects everything you just paid for.
Post renovation cleanup and first-year maintenance are not glamorous tasks, but they are the difference between a renovation that looks impressive on day one and one that still looks and functions well five years later. Follow the checklist in order, respect curing timelines, document everything, and stay ahead of maintenance rather than reacting to problems. Your home will reward that discipline with lower repair costs, better indoor air quality, and stronger resale value when the time comes.