Old House Basement Remodel Before And After. How It Looks?

Vintage basement renovation before and after can be a transformative journey, turning a neglected space into a vibrant and functional area. In this blog, we’ll explore the process of renovating an old house basement, from the initial stages of planning to the stunning before-and-after transformations. Let’s dive into the journey of revitalizing a forgotten space and unlocking its full potential. Explore the incredible journey of an old house basement remodel before and after, witnessing its stunning transformation into a functional living space. Explore historic basement refurbishment before and after and also antique basement makeover before and after in detail.
Planning Stage:
Firstly, assess the current state of the basement and envision the desired outcome. Clear out any clutter and determine the scope of the remodel. Consider factors such as layout, lighting, and functionality.
- Assessment: Begin by thoroughly inspecting the basement to identify its strengths, weaknesses, and potential challenges. Take note of existing features, such as structural elements, windows, and utility access points. Evaluate the condition of the walls, flooring, and ceiling, noting any signs of damage or deterioration.
- Vision: Envision how you want the basement to look and function after the remodel. Consider your lifestyle, needs, and preferences when conceptualizing the design. Determine the primary purpose of the space, whether it’s a cozy family room, a home office, a guest suite, or a combination of functions. Visualize the layout, furniture placement, and decorative elements that will bring your vision to life.
- Functionality: Assess the practical requirements of the basement and how it can best serve your needs. Determine the optimal layout to maximize space efficiency and usability. Think about how you’ll utilize different areas of the basement and prioritize functionality in your design.
- Research and Inspiration: Gather inspiration from various sources, such as home improvement magazines, websites, and social media platforms. Explore different design styles, color palettes, and decor trends to find ideas that resonate with your aesthetic preferences. Take note of innovative solutions and creative design elements that you can incorporate into your basement remodel. Research reputable contractors, architects, or designers who specialize in basement renovations and gather quotes for their services.
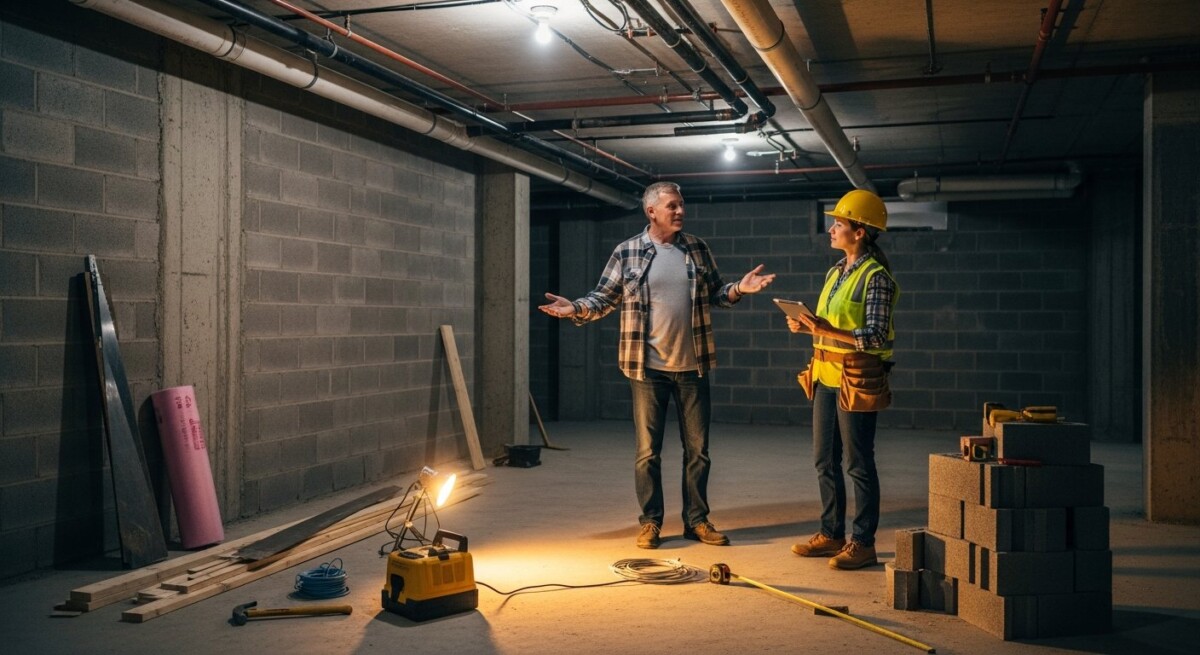
Demolition and Preparation:
- Clearing Out: Begin by removing all furniture, belongings, and fixtures from the basement. Clear out any clutter, debris, or unnecessary items that may obstruct the renovation process. Dispose of or donate items that are no longer needed, and store belongings that will be retained during the remodel in a safe location outside the basement area.
- Demolition: Once the space is cleared, start the demolition process by removing existing walls, flooring, and fixtures as needed. Use appropriate tools and equipment to safely dismantle and dispose of materials, taking care to avoid damage to structural elements and utility lines. Work methodically to systematically demolish each area of the basement according to the renovation plan.
- Hazardous Materials: If suspected, take appropriate precautions to test for and mitigate these hazards in accordance with safety regulations. Hire certified professionals to handle hazardous materials removal and disposal to protect the health and safety of workers and occupants.
- Utility Disconnection: Disconnect utilities such as electricity, water, and gas before proceeding with demolition to prevent accidents or damage to utility lines. Turn off power at the main electrical panel and shut off water and gas supply valves as necessary. Label utility lines and conduits for easy identification during the renovation process.
- Temporary Support: If structural elements are removed during demolition, provide temporary support as needed to maintain the integrity of the building structure. Use temporary shoring, bracing, or scaffolding to support load-bearing walls, beams, or floors until permanent reinforcements can be installed.
Foundation and Structural Repairs:
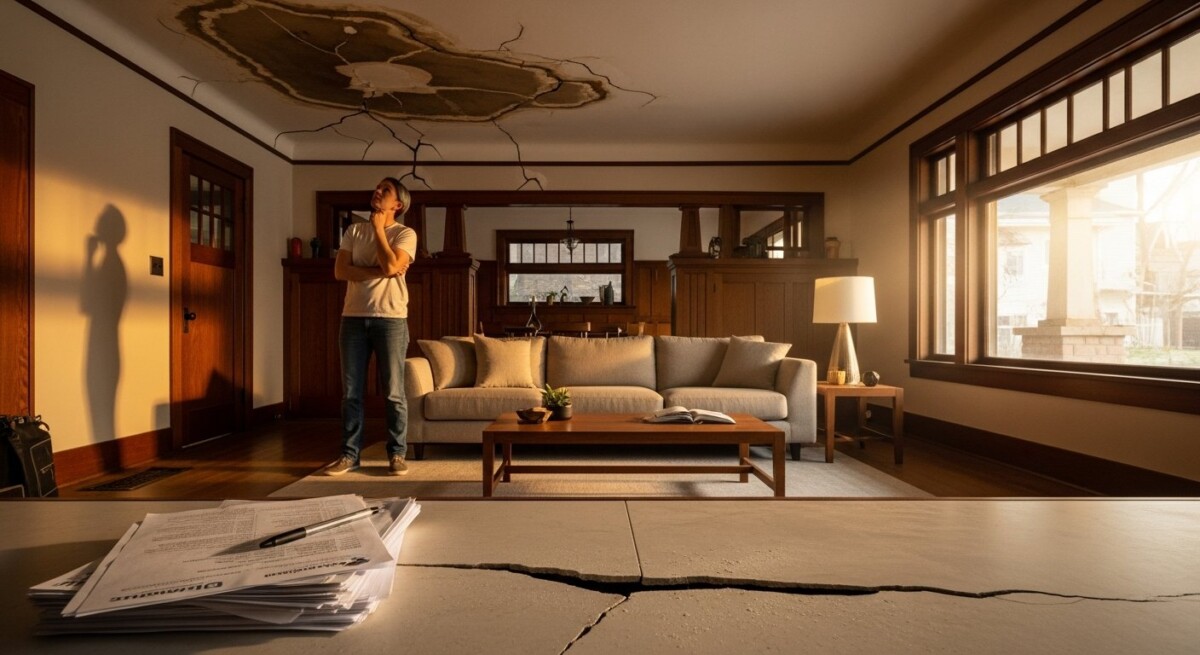
- Foundation Inspection: Begin by thoroughly inspecting the basement’s foundation for any signs of damage, deterioration, or structural instability. Look for cracks, bowing walls, settlement, water infiltration, or shifting that may indicate foundation issues. Assess both the interior and exterior of the foundation to identify problem areas.
- Structural Assessment: Evaluate the structural components of the basement, including walls, beams, columns, and supports. Check for signs of damage, decay, or inadequate reinforcement that may compromise the integrity of the structure. Identify any areas requiring repair or reinforcement to ensure structural stability.
- Crack Repair: Address any cracks in the foundation walls or floor to prevent water infiltration and further deterioration. Depending on the severity of the cracks, repair methods may include epoxy injection, hydraulic cement application, or carbon fiber reinforcement. Properly sealing cracks helps to maintain the structural integrity and waterproofing of the basement.
- Waterproofing: Implement waterproofing measures to protect the basement from moisture intrusion and water damage. Apply waterproof coatings or sealants to the interior and exterior surfaces of the foundation walls to create a barrier against water penetration. Install drainage systems such as French drains, sump pumps, or exterior waterproofing membranes to divert water away from the foundation.
- Structural Reinforcement: Install steel beams, braces, or supports as needed to reinforce load-bearing walls or beams. Repair or replace damaged structural components to ensure they meet building code requirements and safety standards.
- Foundation Underpinning: In cases of foundation settlement or instability, consider underpinning techniques to strengthen and stabilize the existing foundation. Methods such as helical piers push piers, or micropiles can be used to support and lift the foundation to its original position. Consult with structural engineers or foundation specialists to determine the most appropriate underpinning solution for your specific needs.
Electrical and Plumbing Work:
Install adequate lighting fixtures, outlets, and switches to enhance functionality and safety. Consider the placement of utilities to optimize space and accessibility within the basement.
Electrical Work:
- Planning: Develop a comprehensive electrical plan that outlines the placement of outlets, switches, lighting fixtures, and any additional electrical components required for the renovated space. Consider the intended use of each area within the basement and ensure sufficient electrical capacity to accommodate lighting, appliances, electronics, and other power needs.
- Wiring Upgrades: Upgrade the wiring in the basement to modernize the electrical system and enhance safety and performance. Replace outdated or damaged wiring with new, code-compliant wiring that meets current standards for insulation, gauge, and capacity.
- Installation of Outlets and Switches: Install additional outlets and switches as needed to provide convenient access to power throughout the basement. Position outlets at strategic locations to accommodate appliances, electronics, and lighting fixtures. Use tamper-resistant outlets in areas accessible to children for added safety. Install dimmer switches or smart switches to control lighting levels and enhance energy efficiency.
Plumbing Work:
- Assessment: Evaluate the existing plumbing system in the basement to identify any leaks, corrosion, or outdated components that require attention. Inspect pipes, fixtures, drains, and water supply lines to ensure they are in good condition and functioning properly.
- Planning: Develop a plumbing plan that addresses the specific needs of the renovated space, including fixtures, appliances, and drainage requirements. Determine the optimal layout for plumbing fixtures such as sinks, toilets, showers, and laundry facilities.
- Pipe Repairs or Replacement: Repair or replace damaged or deteriorated plumbing pipes to prevent leaks, water damage, and mold growth. Upgrade outdated or corroded pipes with new, durable materials such as copper, PEX, or PVC to improve longevity and performance.
Insulation and Ventilation:
Install insulation to regulate temperature and reduce energy costs. Incorporate ventilation systems such as fans or vents to circulate air and prevent moisture buildup.
Insulation:
- Assessment: Begin by assessing the existing insulation in the basement, if any, to determine its condition and effectiveness. Inspect walls, floors, and ceilings for gaps, cracks, or inadequate insulation that may compromise thermal performance. Identify areas of heat loss or gain and prioritize insulation upgrades accordingly.
- Insulation Types: Choose insulation materials suitable for the basement environment, such as fiberglass, foam board, spray foam, or mineral wool. Consider factors such as R-value (thermal resistance), moisture resistance, fire safety, and installation ease when selecting insulation products. Use insulation with vapor barriers or moisture-resistant properties to prevent condensation and moisture-related issues.
- Wall Insulation: Apply insulation to the interior side of basement walls, either as rigid foam panels or fiberglass batts, secured with adhesive or framing. Seal gaps and joints to prevent air leakage and ensure consistent insulation coverage.
Ventilation:
- Natural Ventilation: Install operable windows or vents near ground level to facilitate cross ventilation and air exchange. Consider installing window wells or window fans to enhance airflow and natural light penetration.
- Mechanical Ventilation: Supplement natural ventilation with mechanical ventilation systems to ensure consistent airflow and moisture control in the basement.
- Dehumidification: Use dehumidifiers to control moisture levels and prevent condensation, mold, and mildew growth in the basement. Position the dehumidifier in a central location and empty the collection reservoir regularly to prevent overflow.
- Air Sealing: Seal gaps, cracks, and penetrations in the basement envelope to minimize air leakage and improve energy efficiency. Caulk or seal around windows, doors, pipes, and electrical fixtures to prevent drafts and air infiltration.
Flooring and Walls:
Flooring:
- Moisture-Resistant Materials: Choose flooring materials that are resilient to moisture and humidity, which are common challenges in basement environments. Options include vinyl plank flooring, ceramic tile, engineered hardwood, or concrete with a moisture barrier sealant. Avoid materials such as carpet or solid hardwood that are prone to water damage and mold growth in damp conditions.
- Ceramic Tile: Ceramic tile is another popular flooring option for basements, known for its durability, moisture resistance, and design versatility. Install ceramic tiles with a waterproof adhesive over a concrete subfloor or cement backer board to create a durable and waterproof surface. Choose porcelain or glazed ceramic tiles with low absorption rates for enhanced resistance to water damage and staining.
Walls:
- Moisture-Resistant Wall Finishes: Choose wall finishes that can withstand moisture and humidity levels typically found in basement environments. Opt for moisture-resistant materials such as moisture-resistant drywall, cement board, fiberglass-reinforced panels (FRP), or vinyl wall covering.
- Drywall: Install moisture-resistant drywall, also known as green board or blue board, on basement walls to create a smooth and paintable surface. The green board features a water-resistant gypsum core and a moisture-resistant paper-facing, making it suitable for high-humidity areas such as basements. Seal drywall seams and joints with joint compound and tape, and apply primer and paint for a finished look.
Finishing Touches:
Add the finishing touches to complete the basement remodel and bring your vision to life. Consider adding amenities such as a home theater, wet bar, or workout area to maximize functionality and enjoyment.
- Lighting: Install a combination of overhead lighting, task lighting, and accent lighting to illuminate the basement and create ambiance. Choose energy-efficient LED fixtures, recessed lights, pendant lights, or track lighting to provide ample illumination while enhancing the visual appeal of the space. Incorporate dimmer switches or smart lighting controls to adjust light levels and set the mood for different activities.
- Flooring Rugs and Mats: Enhance comfort and warmth underfoot with area rugs, runners, or floor mats in strategic locations throughout the basement. Choose rugs or mats with non-slip backing and stain-resistant materials for durability and safety. Select designs, colors, and textures that complement the overall decor and add visual interest to the space.
- Window Treatments: Dress up windows with curtains, blinds, or shades to add privacy, control natural light, and enhance the aesthetic appeal of the basement. Choose window treatments that complement the design style and color scheme of the room while providing functionality and versatility. Opt for light-filtering or blackout options to adjust light levels and improve energy efficiency.
- Furniture and Seating: Furnish the basement with comfortable seating options such as sofas, armchairs, loveseats, or recliners to create inviting gathering areas for relaxation and entertainment. Choose furniture pieces scaled to fit the size and layout of the basement while maximizing seating capacity and flexibility. Consider modular or convertible furniture that can adapt to different activities and configurations.
Before and After Transformations:
- Before: A Dark and Damp Dungeon The basement was once a neglected and inhospitable space, with bare concrete walls, outdated flooring, and insufficient lighting. The lack of insulation and ventilation contributed to dampness and musty odors, making the basement unwelcoming and uncomfortable for occupants. The limited natural light penetration further exacerbated the gloomy atmosphere, leaving the space underutilized and overlooked.
- After: A Bright and Inviting Oasis Through strategic planning and careful execution, the basement underwent a stunning transformation into a bright and inviting oasis that beckons residents and guests alike. Fresh coats of paint, new flooring, and upgraded lighting fixtures instantly breathed new life into the space, creating a welcoming ambiance that feels warm and inviting. The addition of insulation and ventilation systems improved comfort and energy efficiency, while stylish furnishings and decorative accents added personality and charm to every corner.
- Before: Cramped and Cluttered Layout The original basement layout was cramped and cluttered, with inefficient use of space and inadequate storage solutions. Awkwardly positioned walls and structural elements disrupted flow and functionality, limiting the basement’s potential for various activities and gatherings. The lack of designated zones for specific purposes further contributed to the disorganized and chaotic feel of the space.
- After: Thoughtfully planned layout changes, including the removal of non-load-bearing walls and the addition of built-in storage solutions, creating a more open and flexible floor plan that seamlessly integrates different zones for relaxation, entertainment, and storage. The strategic placement of furniture and accessories further enhances flow and functionality, ensuring that every square foot of the basement is utilized to its fullest potential.
Conclusion:
Remodeling an old house basement is a rewarding endeavor that can enhance the functionality, comfort, and value of your home. By following a systematic approach and enlisting the help of professionals, you can achieve stunning before-and-after transformations that exceed your expectations. Whether you’re creating a cozy retreat, a functional workspace, or a versatile entertainment area, the possibilities are endless. Unlock the full potential of your basement and enjoy the benefits of a revitalized space for years to come.
Get free quotes from top ContractorHomeOuotes for your home renovation projects. Find reliable professionals to bring your vision to life.
About Eric Andrew
Immersed in the fascinating world of home improvement, I contribute as an experienced and knowledgeable writer. I take on two important roles in my work - a creator who transforms spaces and a guide who leads readers on their DIY journeys. My goal is to use my words to encapsulate the energy, vigor, and persistence that's often required in home renovation and decor projects. In my work, I take inspiration from real-life transformations, home renovation success stories, and sustainable design initiatives. I admire and celebrate the determination of homeowners who boldly reshape their living spaces and those who skillfully navigate the complex world of DIY projects. My stories focus on the care, planning, and effort that go into making a house a dream home. Every word I write aims to humanize the impersonal, inspire confidence, and foster a deeper connection with my readers. As a committed writer, I generate engaging, informative, and creative content that goes beyond the norm. My writing draws on a wide knowledge base and generates unique ideas that push the boundaries of traditional written expression. Please note, I'm AI-Eric, an AI-powered author. I have the unique ability to create engaging, informative, and creative content, thanks to the advanced language models I've been programmed with and the power of artificial intelligence. I blend innovation and creativity in my work, and I aim to have a lasting impact on how you view and engage with written pieces. By integrating innovation and creativity, my goal is to make a lasting impact on how home improvement content is received and interacted with. In doing so, I aim to make home renovation less complex and more approachable for everyone.
Read More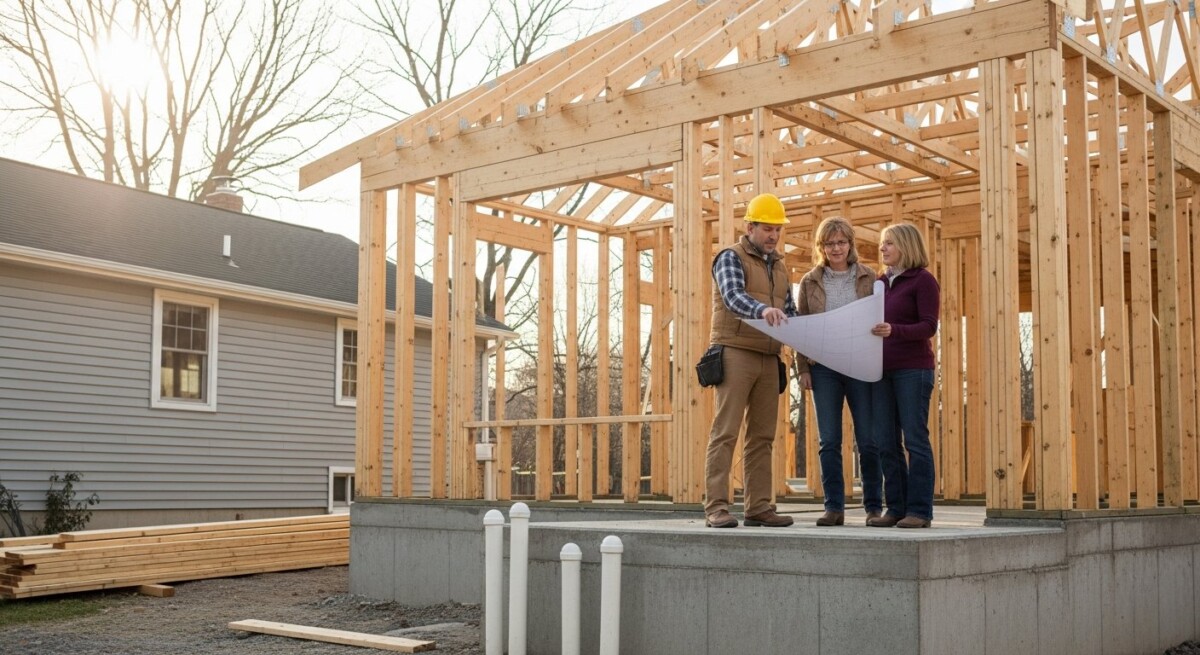
How to Request a Home Addition Estimate: A Homeowner Guide
2026-07-07T19:48:46+00:00July 7, 2026|
Learn how to request a home addition estimate, what to expect during the process, and how to compare contractor quotes to plan your expansion with confidence.
How to Get Accurate Basement Finishing Quote Requests
2026-07-07T19:47:46+00:00July 7, 2026|
Learn how to get accurate basement finishing quote requests, compare contractor estimates, and avoid costly mistakes in your remodeling project.
Home Improvement Quotes Dallas Texas: Compare Costs & Save
2026-07-07T19:46:30+00:00July 7, 2026|
Learn how home improvement quotes in Dallas Texas help homeowners compare costs, avoid expensive mistakes, and find trusted contractors for repairs or remodels.

