Are Unsightly Ceiling Holes Bringing You Down? Unveiling the Secrets of Flawless Ceiling Hole Filling
Ceiling holes can be eyesores that compromise your space’s aesthetics and structural integrity. Ceiling hole filling is a vital skill that allows you to restore the beauty and functionality of your ceiling. This comprehensive article delves into the realm of ceiling hole filling, exploring the importance of seamless repairs, effective filling techniques, and the benefits of achieving flawless surfaces. Discover how mastering the art of ceiling hole filling can transform your space and create a seamless, polished finish.
I. The Significance of Ceiling Hole Filling:
Ceiling hole filling is crucial for maintaining your space’s visual appeal and structural integrity. Timely and proper filling of ceiling holes ensures a seamless surface and prevents further damage.
1. Aesthetics and Visual Appeal:
By filling ceiling holes, you can restore the smooth and even appearance of your ceiling, enhancing the room’s overall aesthetics. This creates a visually pleasing environment.
2. Structural Stability:
Ceiling holes compromise the structural stability of the ceiling, potentially leading to further damage or weakening of the surrounding area. Filling these holes promptly helps maintain the structural integrity of your space.
II. Techniques for Ceiling Hole Filling:
Several techniques can be employed for filling ceiling holes, depending on the size and nature of the holes. Familiarize yourself with some common filling techniques used to achieve flawless results.
1. Spackling or Joint Compound:
For small to medium-sized holes, spackling or joint compound is commonly used. Apply the compound using a putty knife, gradually building up the layers until the hole is filled. Sand the surface once dry to achieve a smooth finish.
2. Drywall Patching:
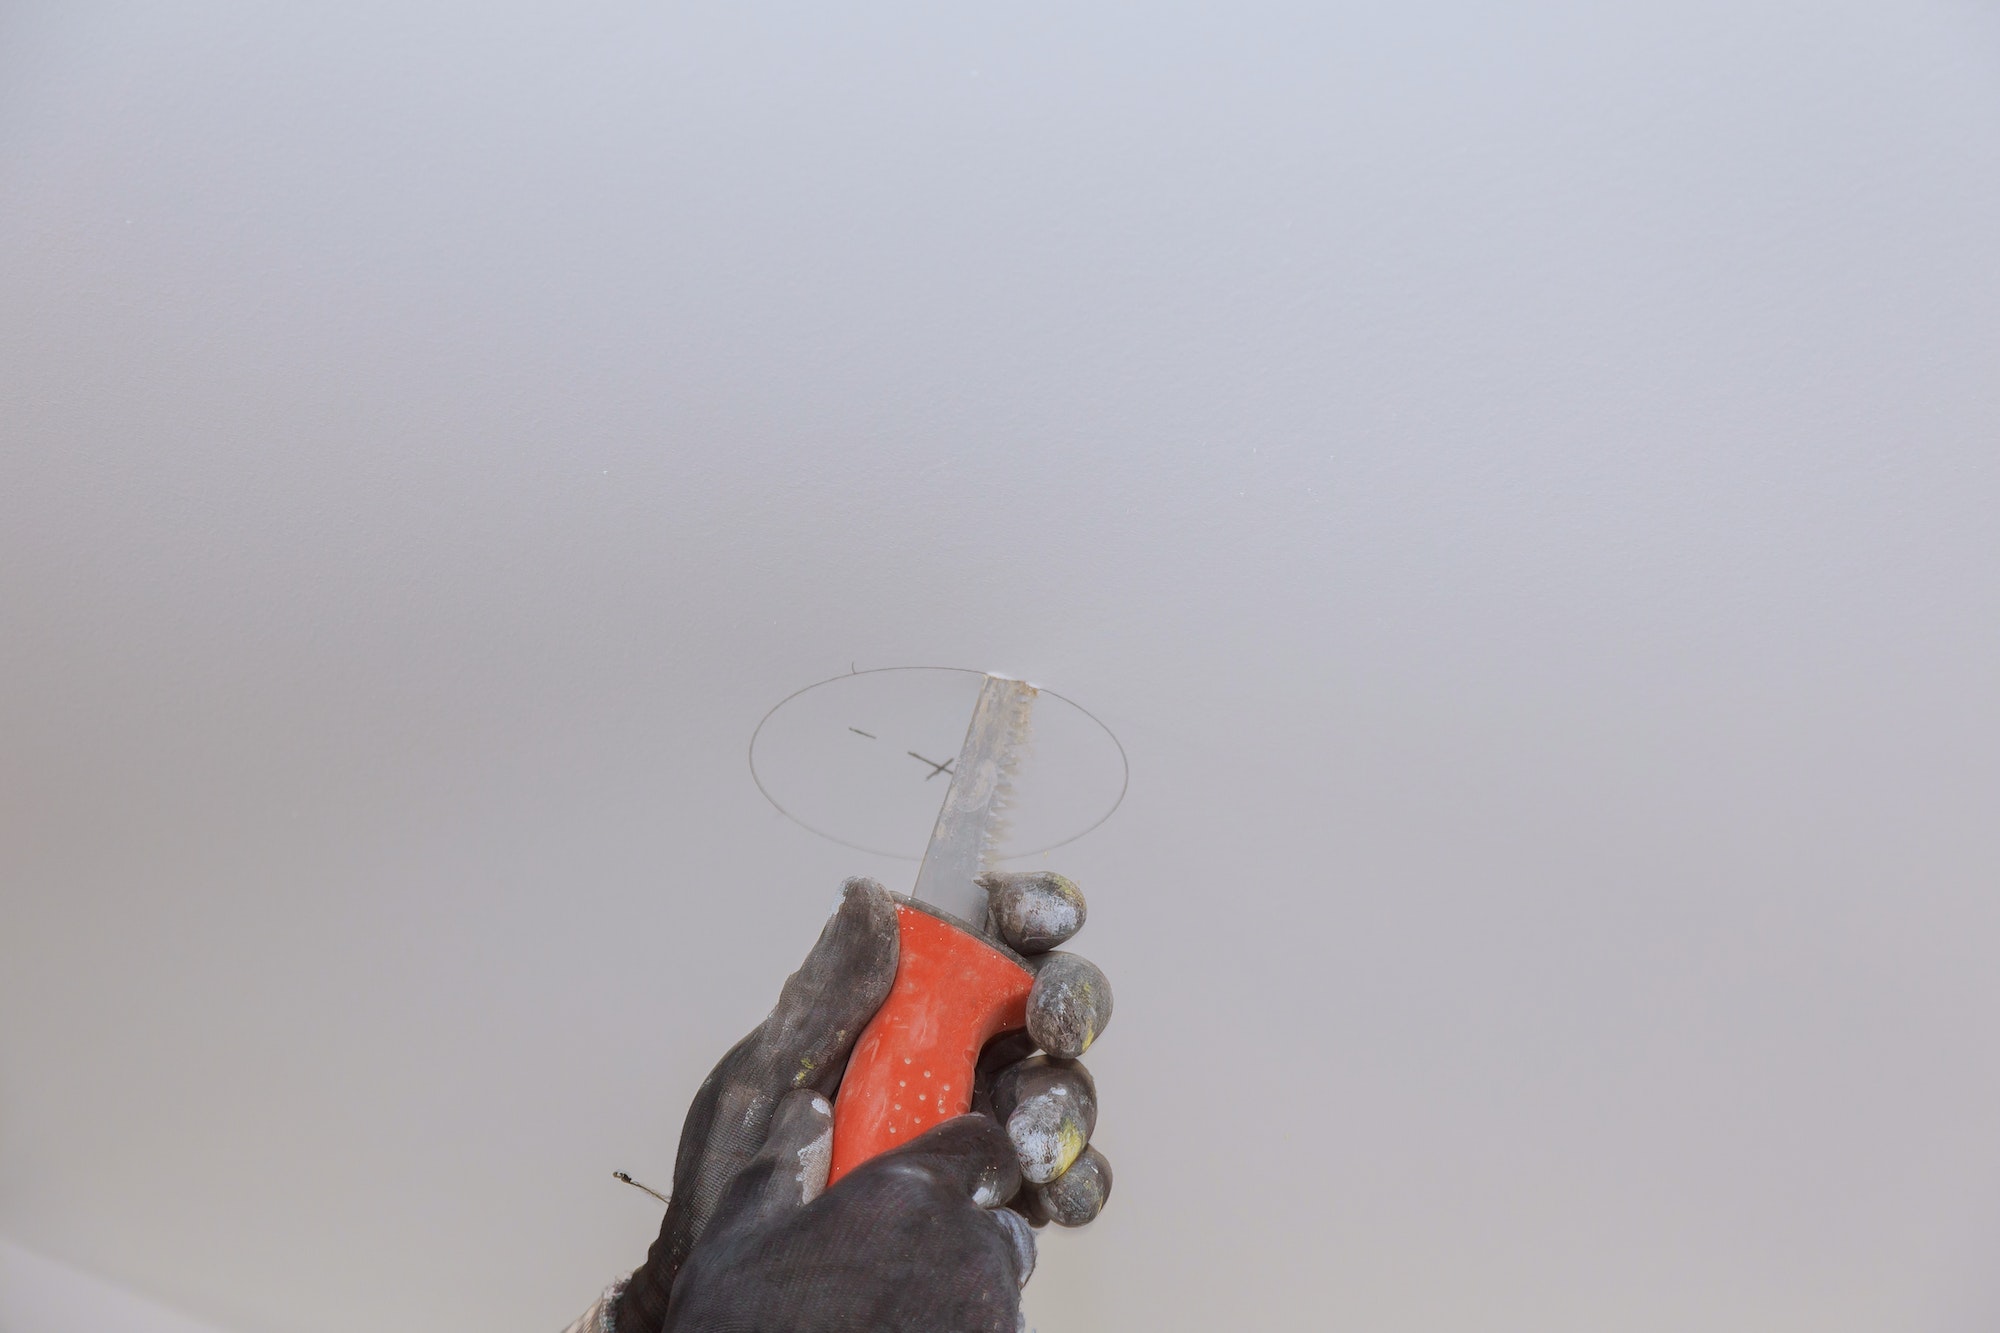
For larger holes or those that require more structural support, drywall patching is necessary. Cut out the damaged area, replace it with a new piece of drywall, and secure it with screws or adhesive. Apply joint compound, feathering the edges for a seamless blend.
III. Steps for Successful Ceiling Hole Filling:
To achieve flawless ceiling hole filling results, follow a systematic approach that ensures proper preparation and execution of the repair process.
1. Prepare the Area:
Clean the area around the hole, removing any loose debris or paint. Ensure the surface is dry and free from dust or grease.
2. Apply Filling Material:
Use the chosen filling technique to carefully fill the hole, applying multiple thin layers if necessary. Before continuing, let each layer thoroughly dry.
3. Sand and Smooth:
Once the filling material is dry, use fine-grit sandpaper to sand the surface, creating a smooth and even finish. Dust should be removed using a fresh cloth.
IV. Benefits of Flawless Ceiling Hole Filling:
Investing time and effort in achieving flawless ceiling hole filling offers numerous benefits, enhancing your space’s overall appeal and functionality.
1. Enhanced Aesthetics:
Flawless ceiling hole filling creates a seamless surface that blends seamlessly with the surrounding area, improving the room’s overall aesthetics.
2. Improved Property Value:
Maintaining a flawless ceiling through proper hole filling contributes to the overall value of your property. Potential buyers appreciate well-maintained spaces that exhibit attention to detail.
V. Seeking Professional Assistance:
While smaller ceiling hole filling projects can be tackled as DIY projects, certain situations may require the expertise of a professional contractor. Recognize when it’s best to seek professional assistance.
1. Extensive Damage:
If the ceiling holes are extensive or part of a larger renovation project, it is advisable to consult a professional contractor. They have the experience, tools, and materials to address complex repairs effectively.
2. Skill and Precision:
Achieving flawless ceiling hole filling requires skill and precision. Hiring a professional can ensure the best results if you are still determining your abilities or desire a perfect finish.
V. Additional Considerations for Ceiling Hole Filling:
To ensure successful and long-lasting ceiling hole filling, there are a few additional considerations to keep in mind throughout the process.
1. Proper Tools and Materials:
For the best outcomes, the appropriate equipment and supplies must be used. Ensure you have a putty knife, sandpaper, appropriate filling compound, and any necessary patching materials for larger holes or damaged areas.
2. Matching Texture:
If your ceiling has a textured finish, aim to match the texture of the surrounding area when filling the hole. You can use techniques such as stippling or using a texture spray to create a consistent appearance.
3. Prime and Paint:
After completing the ceiling hole filling process, it is essential to prime and paint the repaired area to blend it seamlessly with the rest of the ceiling. Pick paint that matches the current ceiling’s color and finish.
4. Safety Precautions:
When working on ceiling hole filling projects, prioritize safety. When sanding, use safety goggles and a dust mask, use the right ladder or scaffolding equipment, and adhere to all electrical and structural safety regulations.
5. Quality Assurance:
Before considering the ceiling hole filling process complete, conduct a final inspection to ensure the repaired area is smooth, even, and matches the surrounding ceiling. Make any necessary touch-ups or adjustments as needed.
FAQs:
1. Can I use regular spackle for filling larger ceiling holes?
Regular spackle is suitable for small to medium-sized holes. However, it is recommended to use a patching material specifically designed for drywall repairs or consider using drywall patching techniques for larger ceiling holes.
2. How long does ceiling hole filling take to dry before sanding and painting?
Filling compounds can dry more quickly or more slowly depending on the humidity, temperature, and type of material utilized. It is best to refer to the manufacturer’s instructions for drying times, but typically, it may take 24 to 48 hours for the compound to dry before sanding and painting fully.
3. Can I use caulk to fill ceiling holes?
Caulk is not typically suitable for filling ceiling holes, as it is primarily used for sealing gaps or joints rather than providing structural support. It is best to use appropriate filling compounds or patching materials designed for drywall repairs.
4. How do I match the texture of my ceiling when filling a hole?
Matching the texture of your ceiling can be challenging. One option is to use a texture spray that matches the existing texture. Another method is to create a similar texture using techniques like stippling with a brush or sponge. Practice on a test surface to achieve the desired result before applying it to the repaired area.
5. Can I paint over the repaired area immediately after filling the ceiling holes?
It is recommended to allow the filled area to dry completely before painting. This ensures that the filling compound has cured properly and provides a solid base for paint adhesion. Refer to the product instructions for specific drying times before applying paint.
Conclusion:
Ceiling hole filling is a vital aspect of maintaining your space’s aesthetics and structural integrity. You can transform unsightly holes into seamless surfaces by mastering the art of flawless filling techniques. Embrace the significance of ceiling hole filling, restore the beauty of your ceilings, and create a polished finish that elevates the overall appeal of your space. Visit our website ContractorHomeQuotes.com to learn more.
About Margaret Sheridan

Deck Building Estimate Requests Made Simple for Homeowners
Learn how deck building estimate requests work, what affects costs, and why getting professional quotes early saves money and keeps your family safe.

Average Renovation Pricing Guide: What Homeowners Should Know
Learn what affects renovation costs with this average renovation pricing guide for homeowners. Get tips on budgeting, warning signs, and choosing the right contractor.
Contractor Matching Service: Find the Right Pro Fast
Learn how a contractor matching service helps homeowners find qualified pros fast. Compare quotes, avoid costly mistakes, and protect your home.
Find a Pro!
"*" indicates required fields

