
Bathroom Remodeler Vetting Checklist for Homeowners
Use this bathroom remodeler vetting checklist to verify licenses, insurance, and references, so your renovation stays on budget and avoids costly surprises.

By Chelsea Kris
Learn more about Bathroom Remodel for guides, costs, and what to expect.
Compare Bathroom Remodel Pros Near You

Enter your ZIP code to compare top-rated local professionals and request free quotes.
Your bathroom remodel will likely cost anywhere from $12,000 to $35,000 or more, and it will disrupt your daily routine for weeks. Choosing the wrong remodeler can turn that investment into a nightmare of delays, cost overruns, and unfinished work. The difference between a smooth renovation and a stressful one usually comes down to one thing: how thoroughly you vet the contractor before signing anything. This bathroom remodeler vetting checklist walks you through every critical step, from verifying licenses to reading contracts, so you can hire with confidence and protect your home and your wallet.
Why a Structured Vetting Process Matters
Bathroom remodeling is one of the most complex residential projects you can undertake. It involves plumbing, electrical work, waterproofing, tile installation, cabinetry, and often structural modifications. Each trade brings its own licensing requirements, and a single mistake in waterproofing can lead to mold, rot, and thousands of dollars in hidden damage. A remodeler who cuts corners on permits or skips proper moisture barriers might save a few hundred dollars upfront but cost you ten times that in repairs later.
Beyond the technical risks, the financial exposure is significant. Most bathroom remodels require deposits of 10 to 30 percent, and some contractors ask for more. Without a structured vetting process, you have no reliable way to distinguish a seasoned professional from someone who will take your deposit and disappear. According to consumer protection agencies, home improvement scams consistently rank among the top complaints filed each year, with remodeling projects being a frequent target.
A disciplined approach also gives you leverage during negotiations. When you ask specific questions about insurance, permits, and timelines, contractors understand that you are informed and serious. That often translates into more accurate bids, better communication, and a willingness to put commitments in writing. The checklist below organizes your vetting into clear stages so you can move through them methodically rather than trying to remember everything at once.
Stage 1: License, Insurance, and Business Verification
Before you invite anyone into your home, confirm that they are legally allowed to operate and financially protected against accidents. Licensing requirements vary by state and municipality, but most jurisdictions require contractors to hold a valid license for work exceeding a certain dollar threshold. You can verify a license through your state contractor licensing board website, which typically offers a free search by name or license number. Look for the license status (active or expired), the classification (general contractor vs. specialty), and any disciplinary actions or complaints on record.
Insurance verification is equally important. Ask for a certificate of insurance that shows both general liability coverage and workers compensation coverage. General liability protects your property if the crew damages your home, and workers compensation covers injuries to workers on your property. If a worker gets hurt and the contractor lacks workers compensation, you could be held liable for medical bills in some states. Call the insurance company directly to confirm the policy is active and that the coverage limits are adequate for your project size. A common minimum is $1 million in general liability, though larger projects may warrant higher limits.
Here are the specific documents and confirmations to collect during this stage:
- State or local contractor license number and expiration date (verified through the official licensing board)
- Certificate of general liability insurance with policy number and coverage limits
- Certificate of workers compensation insurance (or a valid exemption certificate if the contractor is a sole proprietor)
- Business registration or incorporation documents showing the legal business name and address
- Permanent business address and phone number (not just a cell phone and PO box)
If a contractor hesitates to provide any of these documents or offers excuses about why they are not available, treat that as a serious red flag. Legitimate professionals keep these records current and share them without resistance. You can also cross-check the business name against your state's secretary of state database to confirm the entity is in good standing. This step takes less than an hour and can save you from hiring an unlicensed operator who has no legal obligation to stand behind their work.
Stage 2: References, Portfolio, and Online Reputation
A contractor's past work is the best predictor of future performance. Ask for at least three references from projects completed in the last 12 to 18 months, and make sure those projects are similar in scope to yours. A remodeler who primarily does kitchen updates may not have the waterproofing expertise required for a full bathroom renovation. When you call references, go beyond "Are you happy with the work?" Ask specific questions about timeline adherence, budget accuracy, communication style, and how the contractor handled any problems that arose.
Request a portfolio with before and after photos, and if possible, visit a completed project in person. Seeing the tile work, grout lines, fixture alignment, and cabinetry finish up close tells you more than any photograph. Pay attention to details like whether the shower pan slopes correctly, whether the caulk lines are clean, and whether the vanity doors close evenly. These small indicators reveal the level of craftsmanship and attention to detail you can expect.
Online reputation research should supplement, not replace, direct references. Check Google Reviews, the Better Business Bureau, and any local contractor review platforms. Look for patterns rather than isolated incidents. One negative review about a delayed project is normal; multiple reviews mentioning the same problem (unreturned calls, cost overruns, unfinished punch lists) indicate a systemic issue. Also check whether the contractor responds professionally to negative feedback, since that shows accountability.
For a broader look at how to find and compare pre-vetted local contractors, including bathroom remodeling specialists, you can explore resources like FreeQuotes.Contractors that connect homeowners with qualified professionals and provide free quote request systems. These platforms can streamline your search and help you gather multiple bids more efficiently.
Stage 3: The In-Person Interview and Project Walkthrough
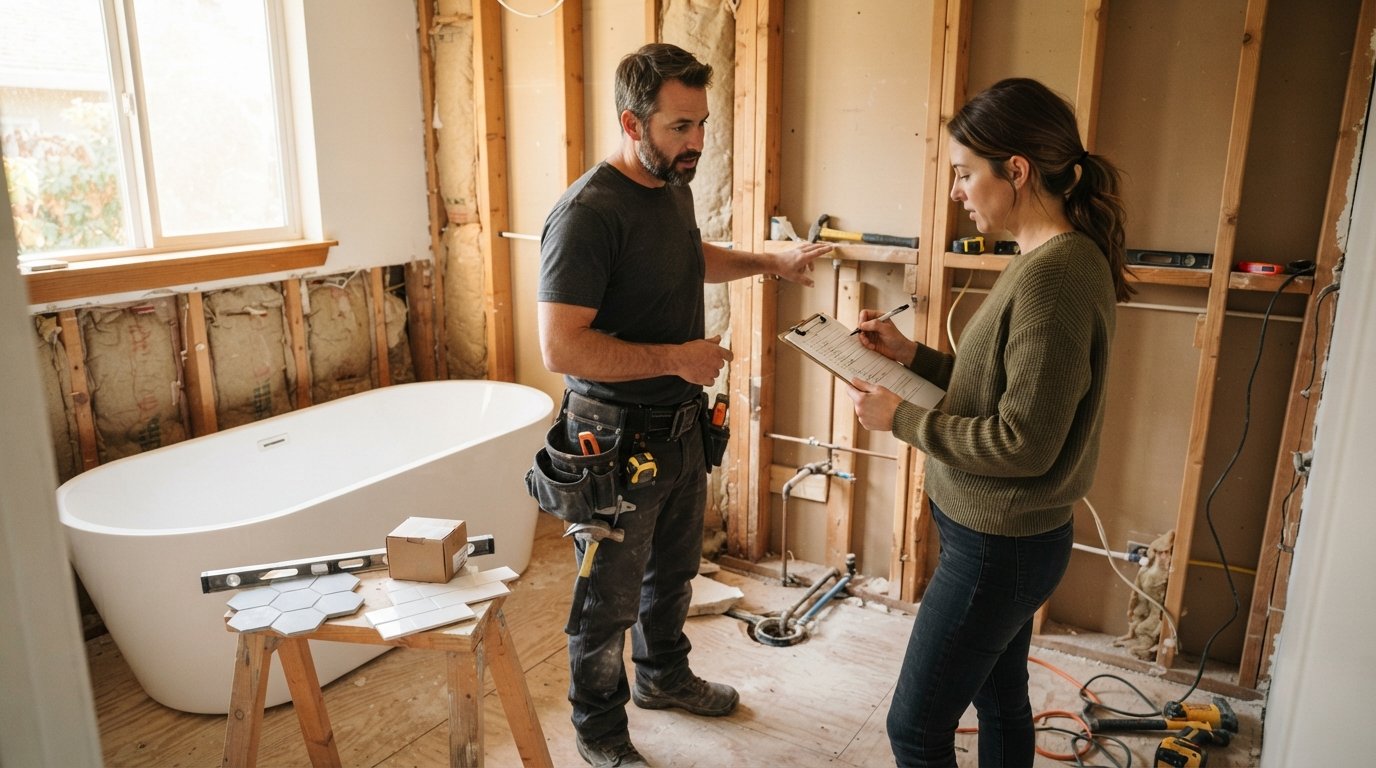
The initial meeting is your opportunity to assess not just the contractor's knowledge but also their communication style and professionalism. A qualified bathroom remodeler will arrive on time, come prepared with a notebook or tablet, and ask detailed questions about your goals, budget range, and timeline. They should walk through the space, inspect existing plumbing and electrical systems, and discuss potential challenges such as moving a toilet drain or upgrading ventilation.
During the walkthrough, pay attention to how the contractor explains the process. Do they use clear language, or do they hide behind jargon? Do they volunteer information about permits and inspections, or do you have to ask? A transparent professional will proactively mention that a building permit is required for most bathroom remodels involving plumbing, electrical, or structural changes, and they will include the permit cost in their bid.
Use this interview as a two-way evaluation. Prepare a list of questions in advance and take notes on the answers. Here are key questions to ask during the walkthrough:
- Who will be the on-site project manager, and how often will they be present?
- Will you use subcontractors for plumbing and electrical, and are they licensed and insured?
- What is your estimated timeline, and how do you handle delays?
- How do you handle change orders, and what is your markup on materials?
- What is your payment schedule, and how much is the deposit?
- Do you provide a written warranty, and what does it cover?
- How do you protect my home during demolition and construction (floor protection, dust barriers)?
After the interview, evaluate whether the contractor listened to your concerns or simply pushed their own preferred approach. The best remodelers balance expertise with flexibility, offering suggestions while respecting your vision and budget. If you feel rushed, dismissed, or pressured to sign immediately, that is a warning sign. A trustworthy contractor will encourage you to take your time and compare bids.
Stage 4: Bids, Estimates, and Contract Review
Once you have interviewed two to four contractors, you will receive written bids. These documents should be detailed enough to compare line by line, not just bottom-line totals. A good bid breaks down labor and materials separately, specifies brands and model numbers for fixtures and finishes, and includes allowances for items you have not yet selected (like tile or lighting). Vague bids that say "bathroom remodel: $18,000" without itemization are impossible to evaluate and often lead to disputes later.
Watch for bids that are significantly lower than the others. A bid that comes in 30 percent below the next closest competitor usually means the contractor has omitted critical costs, plans to use inferior materials, or intends to make up the difference through change orders. Similarly, a bid that is dramatically higher is not automatically better; it may indicate the contractor is not hungry for the work or is padding the estimate. Aim for the middle range from a contractor whose references and portfolio give you confidence.
Before signing anything, review the contract carefully. It should include the following elements:
- Full legal names and contact information for both parties
- Detailed scope of work with specific materials, dimensions, and finishes
- Total project cost and a payment schedule tied to milestones (not just a deposit and final payment)
- Start date and estimated completion date, with provisions for weather or supply delays
- Change order procedures, including how costs and timelines will be adjusted
- Permit responsibilities and inspection requirements
- Warranty terms for labor and materials
- Dispute resolution process (mediation or arbitration clause)
- Lien waiver provisions to protect you from subcontractor claims
Never sign a contract with blank spaces or vague language. If something is unclear, ask for clarification in writing. A reputable contractor will welcome your diligence because it protects both of you. Some states require a three-day right of rescission for home improvement contracts, but do not rely on that as a substitute for reading and understanding every clause before you sign.
Stage 5: Red Flags and Deal Breakers
Certain behaviors should immediately disqualify a contractor, regardless of how impressive their portfolio or bid may seem. The most common red flags include:
- Demanding a large upfront payment (more than 30 percent) or asking for payment in cash only
- Refusing to provide a written contract or pressuring you to sign on the spot
- No physical business address or a history of operating under different business names
- Unable to provide proof of insurance or licensing
- Asking you to pull the permit in your own name (this shifts legal responsibility to you)
- Offering to "take care of" permits by skipping them entirely
- Negative reviews that mention unfinished work, ghosting after deposit, or aggressive collection tactics
Any one of these should give you pause. Two or more should end the conversation. Remember that you are not just hiring someone to install tile and fixtures; you are inviting them into your home and trusting them with a significant financial investment. The cost of walking away from a suspicious contractor is zero. The cost of hiring one can be devastating.
Trust your instincts. If a contractor makes you feel uncomfortable, talks over you, or cannot answer basic questions about licensing and insurance, move on. There are plenty of qualified professionals who will respect your time and your project.
Stage 6: Final Selection and Pre-Construction Preparation
After you have narrowed your options to two or three contractors, do a final comparison. Create a simple scoring sheet that rates each contractor on license and insurance verification, reference feedback, bid detail and clarity, timeline realism, communication style, and warranty terms. Weight the categories based on what matters most to you. For example, if you have a rigid timeline due to a family event, schedule reliability might carry more weight than a slightly lower price.
Once you have selected your remodeler, prepare for construction by clearing personal items from the bathroom, protecting adjacent rooms with plastic sheeting or zip walls, and establishing a communication plan. Ask your contractor how they will provide daily or weekly updates, and confirm who your point of contact will be if the project manager is unavailable. Set expectations about work hours, parking, and access to water and electricity.
Finally, keep a project binder with your contract, change orders, receipts, and correspondence. If a dispute arises, documentation is your best protection. A well-vetted remodeler will appreciate your organization and will likely match your professionalism with quality work and clear communication. By following this bathroom remodeler vetting checklist, you dramatically increase the odds that your renovation finishes on time, on budget, and to the standard you deserve.