Unlocking Secrets: Installing Hinges on Cabinet Doors
Introduction:
You might think installing hinges on cabinet doors is difficult at first, but if you follow a step-by-step plan, you can do it like a pro. This guide will walk you through the whole process, from getting ready to fine-tuning, whether you’re changing old hinges or installing new ones on newly built cabinets. Let’s get into the specifics of how to install hinges on cabinet doors.
Understanding Cabinet Hinges
Before diving into the installation process, it’s essential to understand the types of cabinet hinges available:
- Overlay Hinges: These hinges are attached to the cabinet’s frame. They let the door cover the frame, giving it a modern look.
- Exposed Hinges: Typically used in traditional or rustic designs, exposed hinges are visible outside the cabinet door.
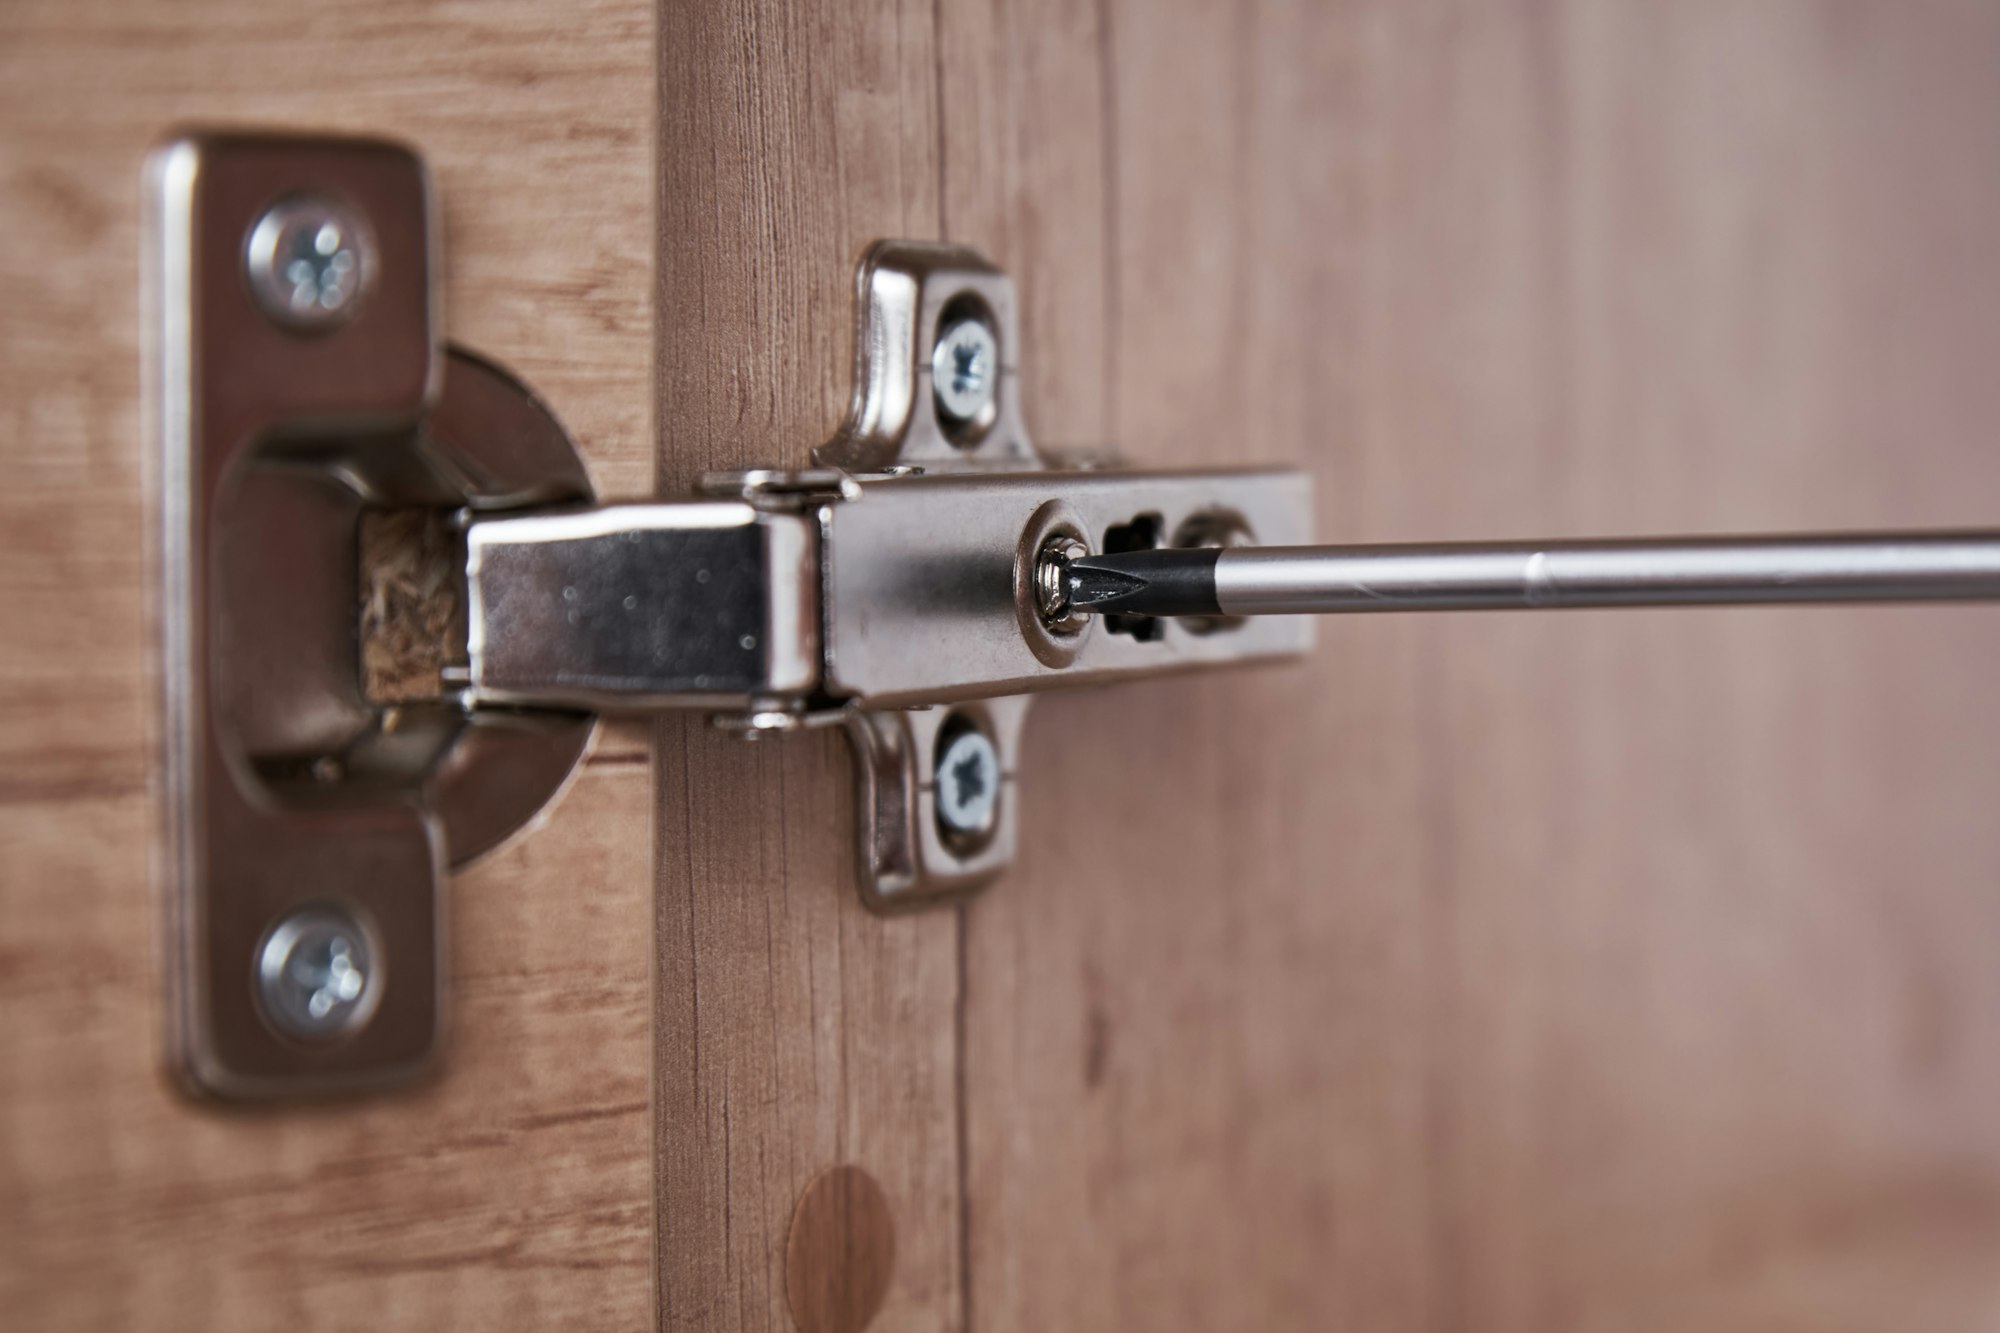
- Concealed Hinges: Also known as European hinges, these are hidden when the cabinet door is closed, offering a sleek appearance.
Tools and Materials You’ll Need
Before you start the process, get the following tools and supplies:
- Screwdriver or drill with appropriate bits
- Measuring tape
- Pencil
- Level
- Cabinet hinges (overlay, exposed, or concealed as per your preference)
- Screws are provided with the hinges.
- Cabinet doors
Step-by-Step Installation Guide
-
Preparation:
- Measure and Mark: Mark on the cabinet door where you want the hinges to go with a pencil and a measuring tape. Use a level to make sure that everything is level and accurate.
-
Installing the Hinges:
- Overlay Hinges: Position the hinge on the edge of the cabinet door, aligning it with your markings. Use a screwdriver or drill to secure the hinge with the provided screws. Repeat this for all hinges.
- Exposed Hinges: Align the hinge on the edge of the cabinet door, ensuring it’s flush with the door’s surface. Secure the hinge with screws using a screwdriver or drill.
- Concealed Hinges: Follow the manufacturer’s instructions for installing concealed hinges, which may vary based on the hinge design. Typically, these hinges require boring holes in the cabinet door and frame for mounting.
-
Attaching the Doors to Cabinets:
- Aligning the Hinges: With the hinges installed on the cabinet doors, align them with the corresponding positions on the cabinet frame.
- Attaching the Doors: Secure the cabinet doors to the frame by fastening the hinges to the frame using screws. Adjust the doors to ensure they open and close smoothly.
-
Testing and Adjustments:
- Checking Alignment: Close the cabinet doors and check for alignment and smooth operation. Make any necessary adjustments by loosening and repositioning the hinges.
- Final Checks: Ensure all screws are tight and the doors are securely attached. Open and close the doors multiple times to verify smooth movement.
Frequently Asked Questions (FAQs)
Q1: How do I put cabinet doors back on hinges?
To put cabinet doors back on hinges, align the hinges on the door with those on the cabinet frame. Secure them in place using screws and ensure the door swings open and closed smoothly.
Q2: What are the different types of cabinet hinges?
There are three types of hinges for cabinets: cover-over hinges, exposed hinges, and secret hinges. Each kind has a different look and job to do.
Q3: How do I install overlay cabinet hinges?
To install overlay cabinet hinges, position the hinge on the edge of the cabinet door and secure it with screws. Repeat for all hinges, ensuring uniform alignment.
Q4: What tools do I need to install cabinet hinges?
You’ll need a screwdriver or drill with the right bits, a level, a measuring tape, and a pencil. These tools will help you correctly measure, mark, and install hinges on doors.
Q5: How do I adjust cabinet hinges for proper alignment?
To adjust cabinet hinges, loosen the screws slightly and reposition the hinge for proper alignment. Test the door’s movement and tighten the screws once satisfied.
To address common queries:
- Putting Cabinet Doors Back on Hinges: Align the hinges on the door with those on the cabinet frame, secure them with screws, and ensure smooth movement.
- Different Types of Cabinet Hinges: Overlay, exposed, and concealed hinges offer varying aesthetics and functionalities to suit different cabinet styles.
- Installing Overlay Cabinet Hinges: Position hinges on the edge of the cabinet door, secure with screws, and repeat for uniformity.
- Adjusting Hinges for Alignment: Loosen screws slightly, adjust the hinge position, and tighten screws once satisfied with door movement.
Conclusion: Mastering Cabinet Hinges Installation
The addition of hinges to cabinet doors changes not only how they work but also how they look. This guide has given you the information you need to feel confident about doing this job, whether just making your kitchen cabinets look better or doing a whole update. To make sure your installation goes perfectly, here’s a full rundown:
Understanding Hinge Types
Which hinges you choose—overlay, visible, or concealed—will depend on the style of your cabinet and your taste. Each type has its advantages when it comes to how it looks and how it works. People like the modern look of overlay hinges, while uncovered hinges give things a more traditional look. Hidden joints, however, make things look sleek and simple.
Preparation and Tools
Before starting, gather all necessary tools: a screwdriver or drill with appropriate bits, measuring tape, a pencil, and a level. Preparation involves careful measurement and marking to ensure precise alignment of hinges on the cabinet doors and frames.
Step-by-Step Installation Process
- Marking and Aligning: Begin by marking where the hinges will be placed on the cabinet doors. Use a level to ensure accurate alignment, which is crucial for seamless operation.
- Installing the Hinges: Follow specific installation steps depending on the hinge type. For overlay and exposed hinges, position each hinge carefully and secure with screws. Concealed hinges may require additional steps like drilling holes for mounting plates.
- Attaching the Doors: Once hinges are installed on the cabinet doors, align them with the corresponding positions on the cabinet frame. Secure them with screws and test the doors to ensure they swing open and close smoothly.
Testing and Adjustments
- Checking Alignment: Close the cabinet doors and check for alignment and smooth operation. Adjust hinges as needed by loosening screws slightly and repositioning.
- Final Checks: Ensure all screws are tightened securely to avoid any wobbling or misalignment. Open and close the doors multiple times to confirm they function smoothly.
Final Words on Installation Excellence
Mastering the installation of hinges on cabinet doors requires attention to detail and precision. Begin with thorough preparation, ensuring all tools are at hand and measurements are accurate. Each step—from marking hinge placements to adjusting for perfect alignment—is essential for achieving a professional finish.
Remember, the beauty of your cabinets lies not just in their design but also in how well they function. By following this guide, you’ll enhance your living space and gain valuable DIY skills. Embrace the process, make adjustments as needed, and revel in the satisfaction of a job well done. Happy installing!
Ready to upgrade? Visit ContractorHomeQuotes.com for free quotes and transform your space today!
About Eric Andrew

Deck Building Estimate Requests Made Simple for Homeowners
Learn how deck building estimate requests work, what affects costs, and why getting professional quotes early saves money and keeps your family safe.

Average Renovation Pricing Guide: What Homeowners Should Know
Learn what affects renovation costs with this average renovation pricing guide for homeowners. Get tips on budgeting, warning signs, and choosing the right contractor.
Contractor Matching Service: Find the Right Pro Fast
Learn how a contractor matching service helps homeowners find qualified pros fast. Compare quotes, avoid costly mistakes, and protect your home.
Find a Pro!
"*" indicates required fields

